 Step 1 : Open any photo in Photoshop. I have opened this high resolution, non watermarked free stock image. If you want to use it you can download it here. You will only need to register at http://www.dreamstime.com/ . There are both paid images and free images for download. I use the free images. There are enough of them.
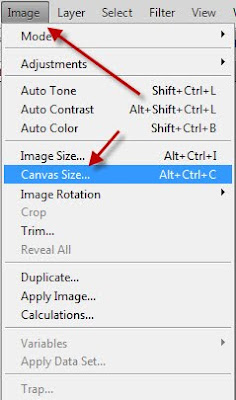 Step 2 : Go to Edit>Canvas Size.
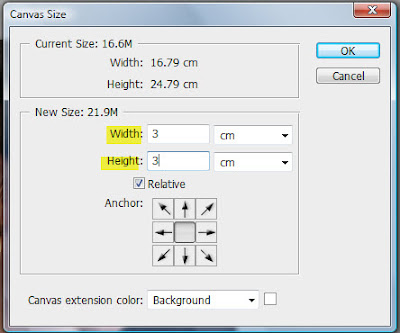 Step 3 : As soon as you click on Canvas Size, this dialogue box will appear. Check the Relative box. This will reset the Width and Height to 0. Type in 3 cm for both Width and Height. Click OK.
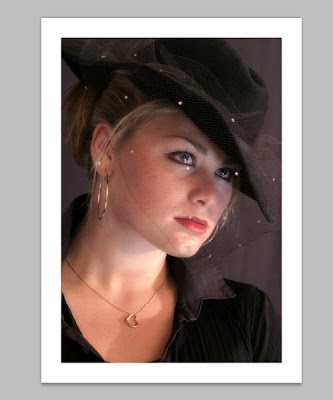 And, you get a nice White Frame.
Step 4 : Now click on the Rounded Rectangle Tool from the fly out.

Step 5 : Look in the top panel. First click on the Paths icon shown by the red arrow. Now type 150 in the Radius box.

Step 6 : Now with the Rectangular Tool drag out from the inside corner of the frame at the top left to the bottom right. A thin selection can me made out. This has to be made visible.

Step 7 : Now click on the Paths palette.

Step 8 : You now see the Work path thumbnail in the Paths palette.

Step 9 : Right click the Work path. You will find this pop up appear. Click on Make Selection. Step 10 : This dialogue box opens. The New Selection will be selected. The Feather Radius should be set to 0 pixel. If it is not type in 0.
Step 11 : You can see the rounded corners now marked by the marching ants.

Step 12 : Look at the Foreground/Background colors. The default setting is Foreground is Black and Background is White. If it not set to the default press 'x' and then 'd' on your keyboard.

Step 13 : Press CTRL+SHIFT+I. The selection will inverse. See above. Press CTRL+Backspace. This will fill the selection with Background Color which is White in this case.

Step 14 : Now click back on the Layers palette.

Step 15 : Press CTRL+J. The frame will be cut and pasted onto a new layer -- Layer 1.

Step 16 : Now CTRL+Click the Layer thumbnail.

Step 17 : As soon as you CTRL+click marching ants surround the entire frame.

Step 18 : Click the Gradient Tool.

Step 19 : Click in the top panel where the arrow points to, to bring up the Gradient Editor.

Step 20 : The Gradient Editor opens. I have clicked on the first gradient in the bottom row. Click OK.
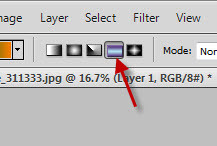 Step 21 : Click on the Reflected Gradient, it is the icon the arrow points to.
Step 22 : I have dragged with the Gradient Tool from left corner bottom to right top corner.

This is the effect I have got. You may choose any Gradient of course in Step 20. You will get a different effect.


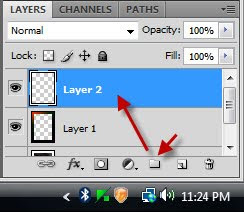
 Step 26 : I am going to download this brush. You will find it here.
Step 27 : When you click on the link, you will find the download button on the left of the page. Click it.

Step 28 : As soon as you click this dialogue box opens. A Brush is always an .abr file. This particular Brush is not in a zip file and can be loaded directly into Photoshop. Click the Save button. The name of the Brush is 'rOman_abstract2'.

Step 29 : Photoshop may open some location in your computer to save the file. That will not do. You have to save it in the Brushes folder in Photoshop. Click on Computer or My Computer.

Step 30 : The configuration of your computer may not be the same, but the steps to install the Brush will be the same. Click on 'C' drive where all your Programme files are loaded.

Step 31 : Click on Programme Files.

Step 32 : Click on Adobe. The Photoshop folder is located inside the Adobe folder.

Step 33 : Click on Photoshop (whatever your version).

Step 34 : Click on Presets.

Step 35 : Click on Brushes.

Step 36 : You can see all the Brushes in Photoshop. They are the same in all versions. Click Save.

Step 37. The Brush downloads. Click Close. The Brush has been installed in Photoshop. If Photoshop is open you will have to close it and start it up again.

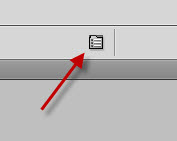
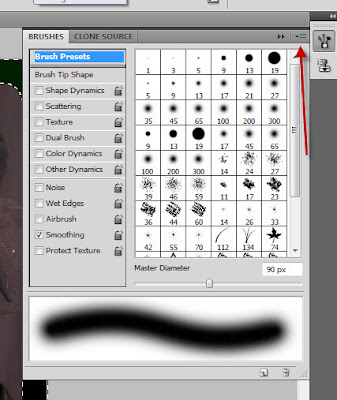
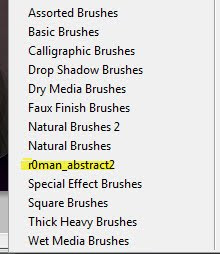

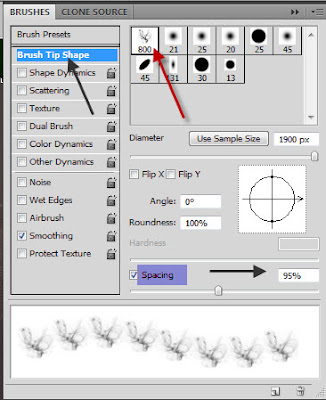
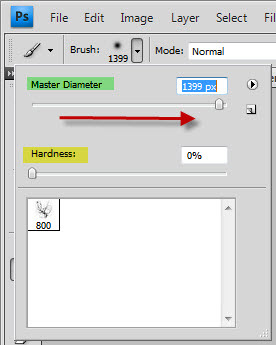


Step 46 : Click with the Brush all around the edges till you are satisfied. Press CTRL+D to deselect. The marching ants go away. The frame is now complete.
Other Photoshop tutorials are here.

Post a Comment