Making a 3D frame for your photos is not at all difficult in Photoshop. It takes a wee bit of practice, but you will be able to do it. If at first you do not get the exact effect at first, try it again.  Step 1 : Open any photo to which you want to add the frame.

 Step 1 : Open any photo to which you want to add the frame.
Step 2 : Your Foreground Color should be Black and Backround White. If it is not press 'x' and then 'd' on your keyboard.

Step 3 : Go to Image>Canvas Size.
 Step 4 : Check Relative. Type 3 cm for both Width and Height. Remember there is nothing hard and fast about it. I am giving these figures for this particular high resolution image. Yours may be different. Click OK.
 Step 5 : This is the effect you get.
 Step 6 : Click the Magic Wand Tool.
Step 7 : Click on the white border with the Magic Wand.

Step 8 : Press CTRL+J. The white frame will be copied and pasted to a new layer -- Layer 1.
 Step 9 : Click on the Polygon Lasso Tool.
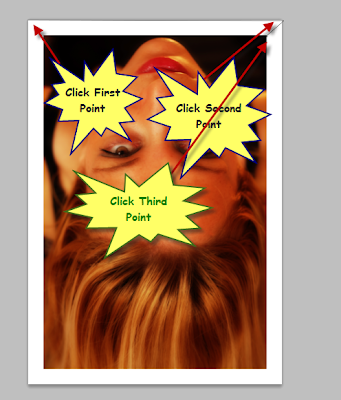 Step 10 : This is the part you have to do carefully. Click with the Ploygon Lasso Tool on the extreme top left corner, then on the extreme top right corner, then click on the inside edge of the frame as shown. Don't let go.
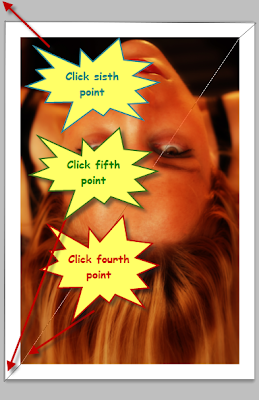 Step 11 : Now click the fourth, fifth till you come to the last i.e. sixth point at the extreme top left.
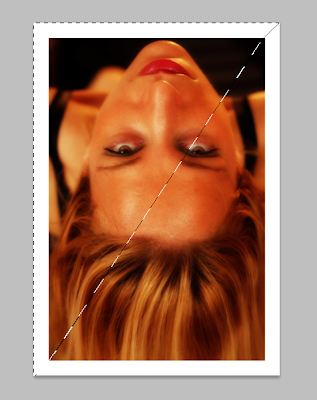 Step 12 : After clicking on the last point you will get a selection like this.
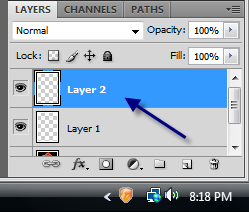 Step 13 : Now press CTRL+J. The selection will be copied and pasted to Layer 2.
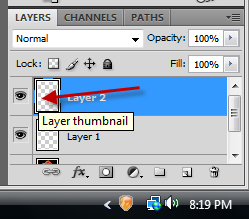 Step 14 : CTRL+Click on the layer thumbnail of Layer 2.
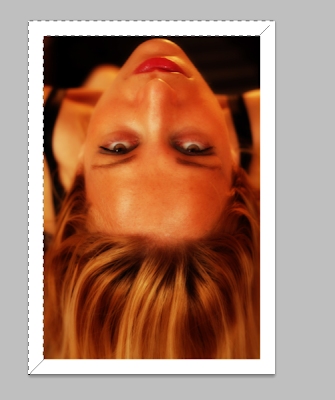 Step 15 : You will find a selection covering half the frame.
 Step 16 : Click on the Foreground Color.
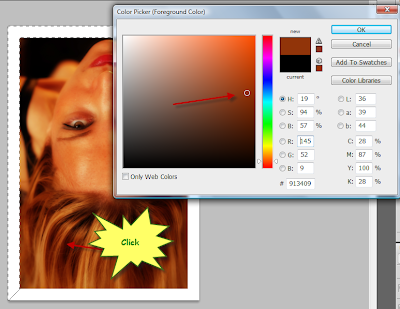 Step 17 : As soon as you click the Color Picker opens. I have now clicked on a brown shade in the hair with the cursor. As soon as you click you will find the shade automatically selected in the left hand box. Click OK.
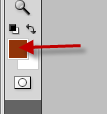 Step 18 : You will find that the Foreground Color changes to the color you picked.
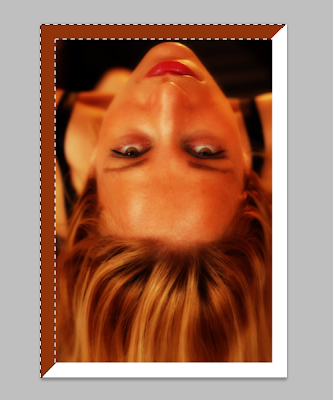 Step 19 : Press ALT+J. This will fill the selection with the color you picked.
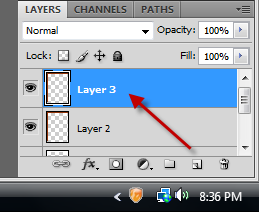 Step 20 : Press CTRL+J. Layer 2 is copied and pasted into Layer 3.
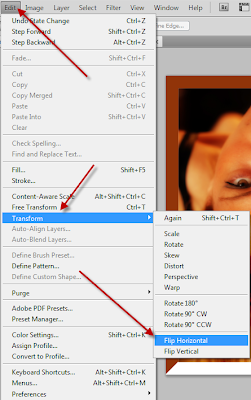 Step 21 : Go to Edit>Transform>Flip Vertical.
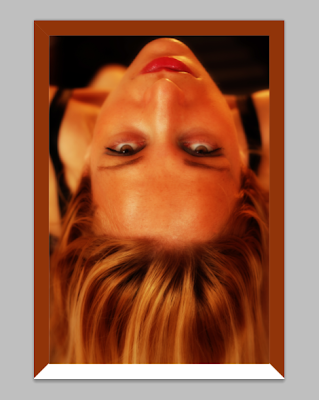 Step 22 : This is how the frame looks.
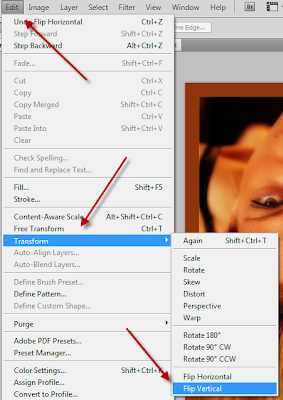 Step 23 : Go to Edit>Transform>Flip Vertical.
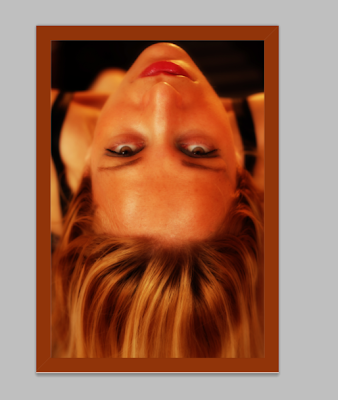 Step 24 : This is how you frame now looks.
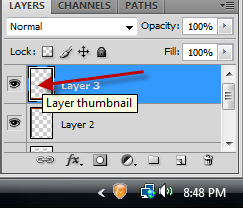 Step 25 : Now CTRL+Click on the layer thumbnail of Layer 3.
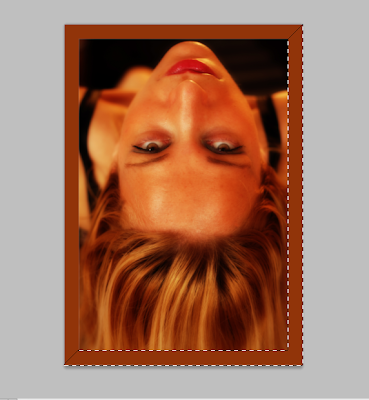 You will now find a selection on the right side of the frame.
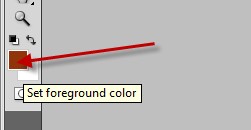 Step 26 : Click on the Foreground Color.
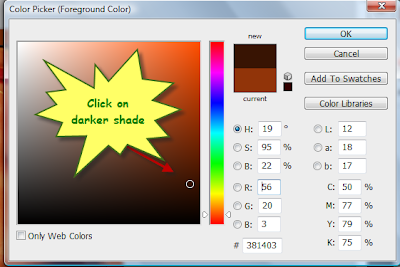 Step 27 : When the Color Picker comes up, click on a darker shade.
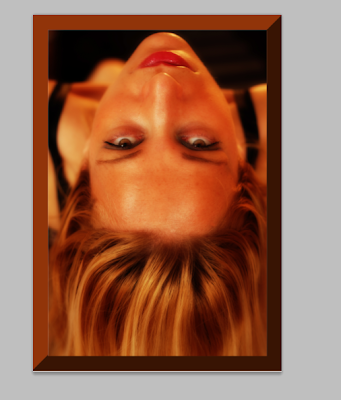 Step 28 : Press ALT+Backspace to fill with the Foreground Color and this is the result I have got. Press CTRL+D and the selection goes away.
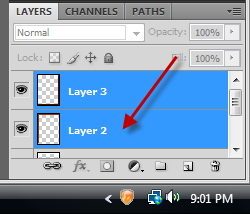 Step 29 : Note that Layer 3 is highlighted. Press SHIFT and click on Layer 2. Both the layers will be highlighted.
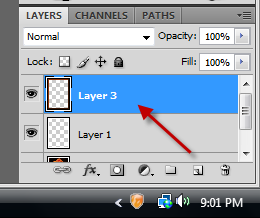 Step 30 : Press CTRL+E. Layer 2 merges into Layer 2.
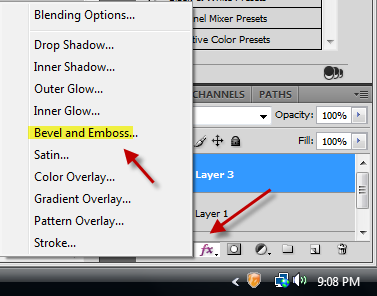 Step 31 : Now click on the Add Layer Style button and from the pop up click on Bevel and Emboss.
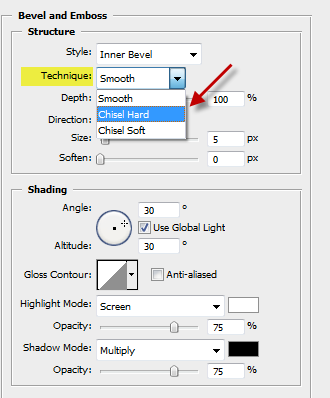 Step 32 : In the Bevel and dialogue box that opens, first change the Technique to 'Chisel Hard'.
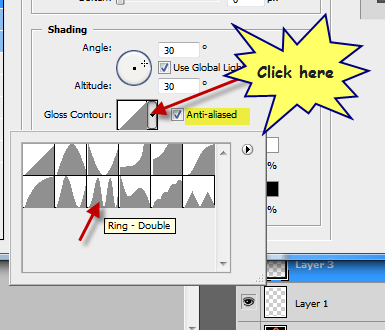 Step 33 : Check the Anti-aliased, the click the Gloss Counter to reveal the presets. Click on Ring Double. It is the one the arrow points to.
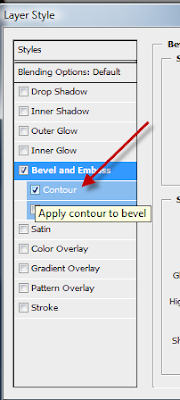 Step 34 : In the left panel check 'Contour'.
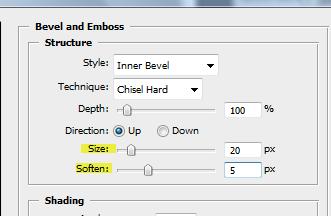 Step 35 : I have dragged the Size slider to 20 pixel and Soften to 5 pixel. There is nothing hard and fast about this. You can move the sliders till you are satisfied with the effect. You will be able to see the effect as you drag the sliders. Click OK.
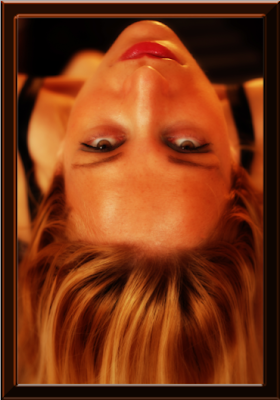 And, here is the completed 3D frame.
Other Photoshop tutorials are here.

Post a Comment