
Removing color cast from images  can be tricky business, because there is no hard and fast rule you can follow. I will try to remove the color cast from the image below. I am using Photoshop CS 4. You might be able to do it in an earlier version too.

Step 1 : I have opened this image in photoshop. It is in a terrible condition.

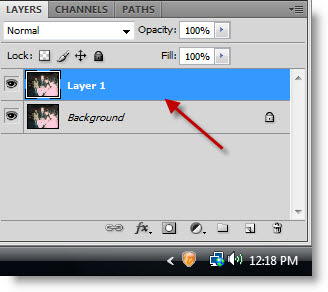
Step 2 : Duplicate the image by pressing CTRL+J.

Step 3 : Go to Image>Adjustments>Channel Mixer.

Step 4 : The Channel Mixer dialogue box opens. Note that the Preset is set to Default.

Step 5 : Click where the arrow points to reveal the Presets available.

Step 7 : I have chosen the Black & White with Orange Filter as the Preset I will use. A word of caution. This will work for this image, it may not for another. You should try the other Presets also.
Click OK.

Step 8 : This is how the image looks. I have zoomed into the image.

Step 9 : I am changing the Blend Mode of Layer1 to Screen.

Step 10 : This is how my image looks.

Step 11 : Press CTRL+E. Both layers merge into the Background layer.
Step 12 : Press CTRL+J to duplicate the Background Layer again.

Step 13 : I have brought up the Channel Mixer again and this time chosen the Blue Output channel.

Step 14 : I am changing the Preset to Black & White with Blue filter.

Step 15 : Note that as soon as you select the Preset, Monochrome at the bottom is automatically checked.
Click OK.

Step 16 : Change the Blend Mode to Hard Light.

Step 17 : I have lowered the Opacity of the Layer to 40%.

Step 18 : Press CTRL+E to merge the two layers into one.

Step 19 : Press CTRL+J to duplicate the Background layer.

Step 20 : Go to Image>Auto Color.

This is how the image looks.

Step 21 : I have lowered the Opacity of the Layer 1 to 55%.

This is how the image looks.

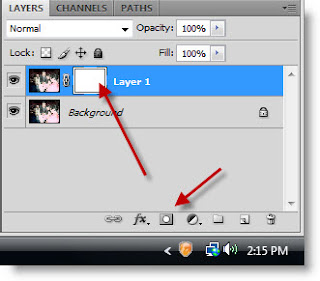
Step 22 : Click on the Add New icon and a New Layer 2 forms.

Step 23 : Go to Edit>Fill.

Step 24 : In the Fill dialogue box set the Use to 50% Gray and click OK.

As soon as you click Ok the image is covered entirely with Gray.

Step 25 : Change the Blend Mode of Layer 3 to Overlay.

The image is visible again.

Step 26 : Click the Brush Tool.

Step 27 : Click in the top panel and set the Hardness to 0. To decrease the size of the brush use the shortcut [ (left bracket key next to the letter p on your keyboard). To increase the brush size press ] (right bracket).

Step 28 : The Foreground Color should be set to the default Black and Background to White.

Step 29 : I have begun painting with the Brush.

I have continued painting and this is the effect I have got. What I have done is burn the areas without using the Burn Tool.

Step 30 : Note that Layer 2 is highlighted. Press SHIFT and click on Background. All three layers are highlighted.

Step 31 : Press CTRL+E. The layers merge into the Background layer.

Step 32 : Press CTRL+J. The Background duplicates into Layer1.

Step 33 : Press CTRL+L. The Levels dialogue box opens. From the Presets I have selected Lighten Shadows. Click OK.

Step 34 : Click the Add New Layer icon and a new Layer 2 forms.

Step 35 : Click the Gradient Tool.

Step 36 : Click in the top panel to bring up the Gradient Editor.

Step 37 : Click on the first Preset -- Foreground to Background. Click OK.

Step 38 : Drag with the Gradient Tool from right bottom to top left.

Step 39 : This is how the image looks with the Gradient applied.

Step 40 : Change the Blend Mode of Layer 2 to Soft Light.

And this is how the image looks.

Step 41 : With the layer 2 highlighted press SHIFT and click on the Background layer. All three layers are highlighted.

Step 42 : Press CTRL+E. All the layers are merged int Background layer.

Step 43 : I have zoomed into the image. There is a lot of color noise. This has to be removed.

Step 44 : Press CTRL+J to duplicate the Background Layer.

Step 45 : Go to Filter>Noise>Reduce Noise.

Step 46 : The Reduce Noise dialogue box opens.

Step 47 : These are the setting I have given at the right. Click OK.

Step 48 : This is how the image looks. The color noise has been removed, but this has blurred some details I would like to retain sharp details such as the eyes and lips.

Step 49 : Click the Brush Tool.

Step 50 : Set the Hardness at 0. You can increase or decrease the brush size with the [ ] (left and right bracket keys).
Step 51 : Click the Add layer Mask and a layer mask forms beside the layer thumbnail on Layer 1.

Step 52 : Make sure that the Foreground Color is set to Black.

Step 53 : Use the Brush to go over the eyebrows, eyes, lips and other details that should not be blurred.

And here is the image. But it's still a trifle bright.

Step 54 : Click the new layer icon and a new Layer 2 appears.

Step 55 : Press SHIFT+F5 to bring up the Fill dialogue box. Set the Use to 50% Gray.

Step 56 : The image fills with Gray.

Step 57 : Change the Blend Mode of Layer 2 to Overlay.

The image is visible again.

Step 58 : The Foreground Color should be set to Black and Background to White. Click the Brush Tool. Use the shortcuts to make the brush large or small.

Step 59 : I am using a fairly large brush to go over the face of the man..

Step 60 : I have gone over the man's coat and face darkening it. Do likewise on other bright areas.

Step 61 : The brushed areas have darkened.

Step 62 : Press X on the keyboard to switch the Foreground Color to White.

Step 63 : I am using a small Brush to lighten this part of the image, which earlier was not fully visible.

This is my finished image.
Post a Comment