
Creating a reflection in Photoshop is not a big deal. I expect you to know how to use the Magnetic Lasso or better still the Pen Tool for cutting out an image from its background. Even if you have not used the Pen tool you can digress a bit and learn it. It is worth learning and is easy the way that I have shown it. The remainder is easy to do.
It should be possible in any version of Photoshop.
It should be possible in any version of Photoshop.

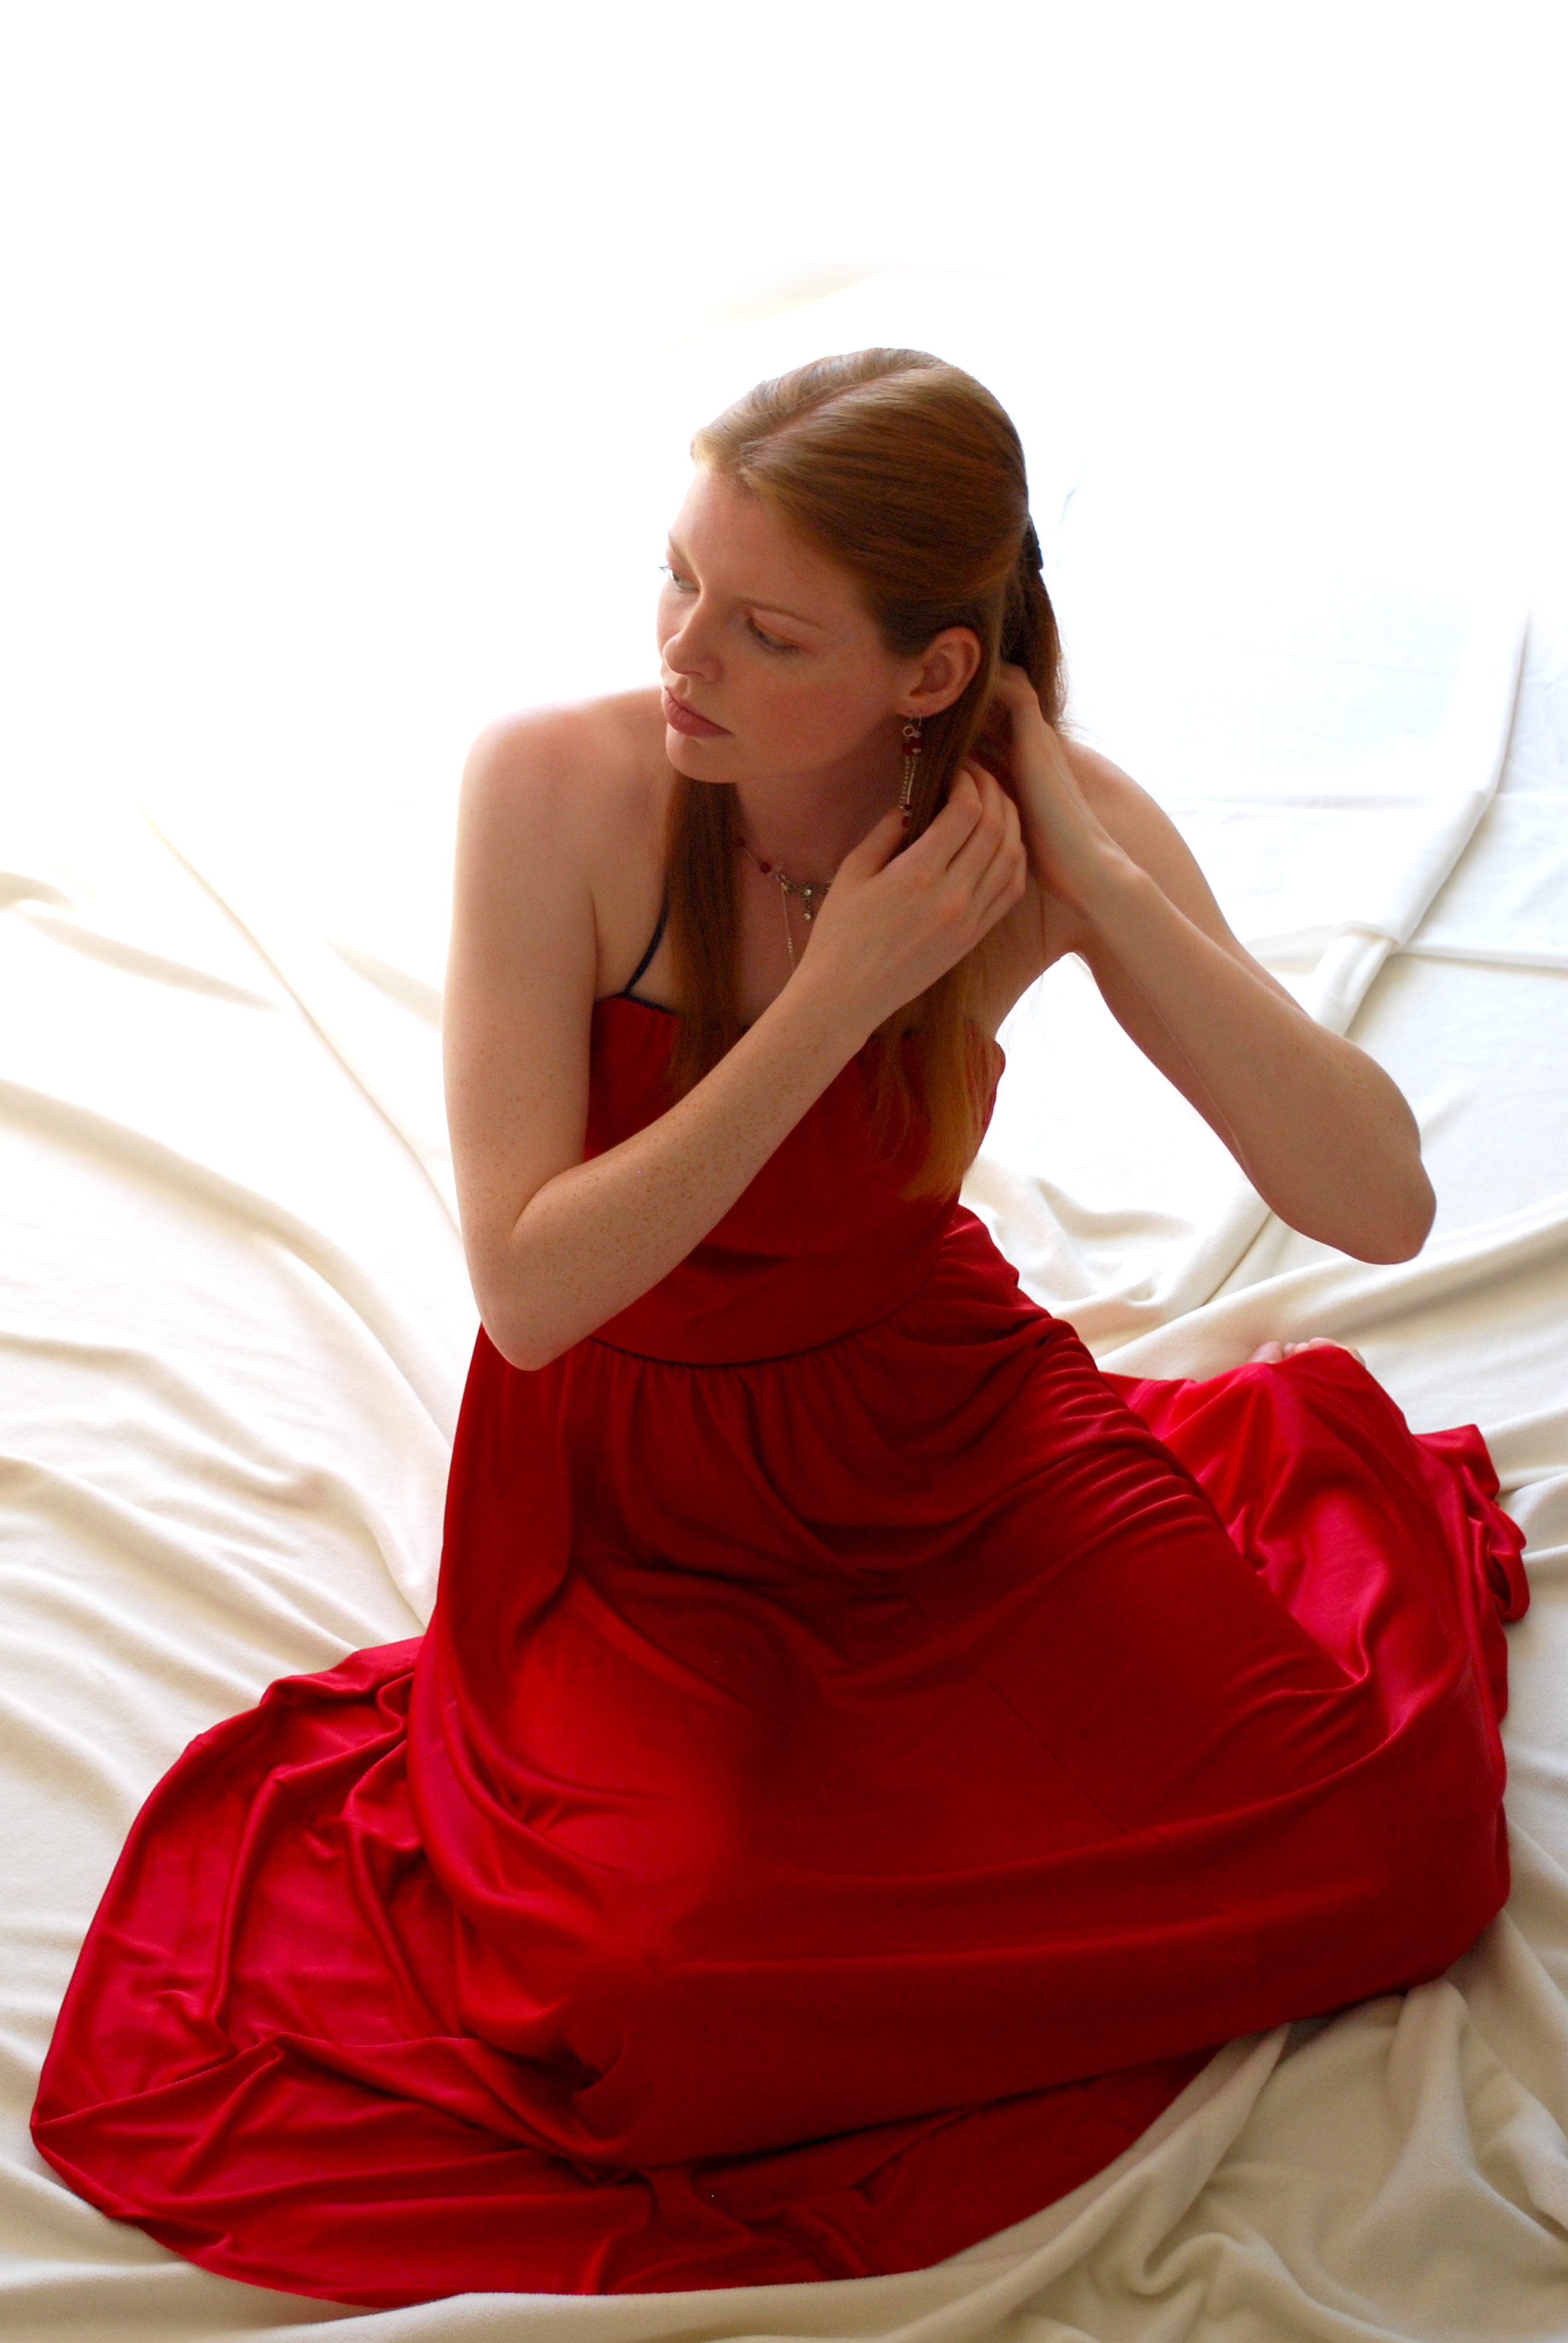
Step 1 : I have opened this free stock image in Photoshop. You can download it here. It belongs to Johanna Chambers

Step 2 : You will have to cut out the figure with either the Magnetic Lasso or the Pen Tool. You will find the links to tutorials when you click on them on using the Magnetic Lasso and Pen Tool to cut out an image precisely if you do not know how to use them.

Step 3 : The image has been cut out cleanly.

Step 4 : Place it on a new White Layer.

Step 5 : In the Layers palette, the image is on Layer 1 and the White Layer is the Background.

Step 6 : Press CTRL+J to duplicate Layer 1. The copied layer is Layer 1 copy.

Step 7 : Go to Edit>Transform>Flip Vertical.

This is how the image looks after flipping it vertically.

Step 8 : Drag the image down as shown. Press RETURN after dragging.

Step 9 : Click the Add Layer Mask button and a Layer Mask forms next to the layer thumbnail on Layer 1 copy.


Step 10 : Click the Brush Tool. At the top drag the Hardness down to 0. You can increase the Brush size with ] (right bracket key) and decrease it with [ (left bracket key).

The Foreground Color should be set to Black. You can switch between Foreground (Black) and Background (White) with the 'x' key.

Step 11 : Begin painting away the red dress, exposing the image below.

Step 12 : Use the Brush to paint away the red dress from the top image so that it reveals the red dress below seamlessly.

This is how it looks at close up.

And this is how the total image looks.

Step 13 : Note that Layer 1 copy is highlighted in the Layers palette. Press SHIFT and click on Layer 1. Both Layer are now highlighted.

Press CTRL+E. Both layer merge into Layer 1 copy.

Step 14 : Click the Layer Mask button. A Layer Mask forms next to the Layer thumbnail on Layer 1 copy.

Step 15 : Click the Rectangular Marquee Tool.

Step 16 : Draw a selection as shown with the Rectangular Marquee Tool.

Step 17 : Make sure Black is the Foreground Color. Click the Gradient Tool. Click on the Gradient Editor.

Step 18 : Click on the first Preset in the Gradient Editor.

Step 19 : Drag downwards from the top of the selection as shown with SHIFT pressed.

This is the effect you will get.

Step 20 : Click on the Background layer to select it.

Step 21 : Click on the Gradient Tool. Then click on the Gradient Editor.

Step 22 : Click on the Stop at the left. The Color will change to Black.

Step 23 : Click the Color. The Select Stop Color dialogue box opens.

Step 24 : Click the eyedropper Tool.

Step 25 : Click on a dark portion of the red gown.

Step 26 : As soon as you click with the eyedropper, the color is automatically picked in the Stop Color dialogue box. Click OK.

Step 27 : Click on the right Color Stop. The Color will change to White. Click the Color.

Step 28 : Click on a bright red portion of the gown.

Step 29 : The color will be automatically selected in the Stop Color dialogue box. Click OK.

Step 30 : The Gradient in the Gradient Editor looks like this. Click OK.

Step 31 : In the top panel the Mode should be set to Normal and Opacity to 100%.

Step 32 : Press SHIFT and you will able to drag down in a straight line with the Gradient Tool.

This is the effect I have got.

Step 33 : Go to Filter>Distort>Spherize.

Step : 34 : The Spherize dialogue box appears. Click OK with the default settings.

You can add some effects with a brush if you want to.

Step 35 : Click the Eyedropper Tool.

Step 36 : Click with the Eyedropper on a shade of red.

Step 37 : Click on the Foreground Color. It has changed to the color picked. The Color Picker opens, Click on a lighter shade. I have picked a pink shade.

Step 38 : The Foreground Color changes to the color picked.
Now you will have to download a brush. You will find it here It is called Square Glow. Download it. If you do not know how to install it, see my tutorial here

Step 39 : Remember you were on the Background Layer. Click the New Layer icon and a new Layer 1 forms over the Background Layer.

Step 40 : Click the Brush Tool.

Step 41 : Click this icon on the top panel at right.

Step 42 : The Brushes dialogue box opens. Click where the white arrow points at the top right.

Step 43 : Locate Load Brushes in the dialogue that opens.

Step 44 : I have downloaded the Brush in a folder on my computer. It is in rar file. You will need Winrar to extract the brush. It is in .abr file. I am clicking on the starwalt square glow brush.

Step 45 : Click the Brush Tip Shape. You will find the Brush when you scroll down with the slider on the right.

Step 46 : I have clicked on the Brush I will use.

Step 46 : Tick the Shape Dynamics and Scattering.

Step 47 : Drag the Spacing slider to the right. I have dragged it 110%.

Step 48 : You can see the Brush. It's a bit too large. Press the [ (left bracket key) to make it smaller.

Step 49 : Click with the Brush at Random. And, this is the effect I have got. You can use various brushes if you like. You can also use the other Brushes that you have in Photoshop. There are plenty of them.
The finished reflection. Other Photoshop tutorials are here
Post a Comment