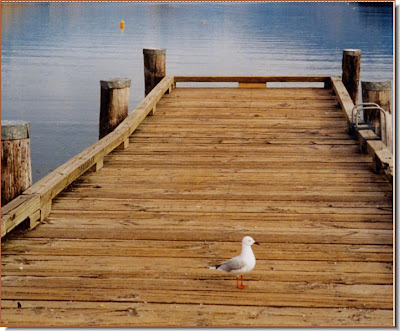
Step 1 : I have opened this photo in photoshop. The bird looks nice on the boardwalk. But I will remove it and make it seem that it was never there. Step 2 : Go to Filter>Vanishing Point.
 Step 3 : The Vanishing Point dialogue box opens.
 Step 4 : On the panel at the left the Create Plane Tool is selected by default. We
will be using it first. Step 5 : With the Create Plane Tool I have clicked first in the foreground then at the top. The lines act like a rubber band when you move it. I have clicked a third point at the right. Immediately a diagonal connects the third and first points.
 Step 6 : I have clicked on the fourth point to crfeate a grid. Note that the grid is red, which means that Photoshop will not be able to work with it. If it had been yellow, it means it is still wrong, but Photoshop will try to make it work. What we need is a blue grid.
 Step 7 : By tugging slightly at the right bottom corner, the grid turns blue, which is perfect.
 Step 8 : Now click on the Stamp Tool. It is a bit different which you use in ordinary photoshop.
 Step 9 : ALT+Click with the Stamp Tool as you would do in PS. The result is not a regular brush but a clone of what you clicked on. If you move the tool after clicking you will see that the tip grows bigger as it approqaches the bottom and smaller as you go towards the top. This is because it is following the plane.
 Step 10 : In the top panel turn on Heal from the drop down menu and you may also check Aligned.

Step 11 : I have now dragged on top of the bird's head with the Stamp Tool.

Step 12 : The bird is gone as I passed the Stamp Tool over it.

Step 13 : Click on ok in the Vanishing Point Tool. And, the finished image. The bird never existed it seems. The Stamp Tool clones in such a away that the result is that none of the boards seems out of place, yet the bird has disappeared. Try it out. That is all.

Post a Comment