
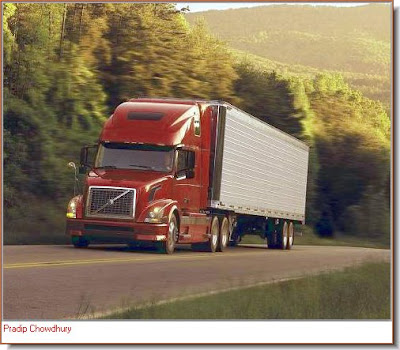
Step 1 : I have opened this photo of a truck which I will elongate and add more wheels.
Step 2 : Press ALT+CTRL+V to access the Vanishing Point Tool and click on the Zoom Tool.
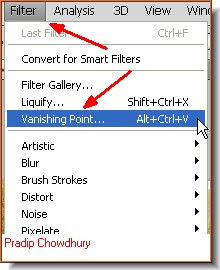
Alternately you can access it by going to Filter>Vanishing Point.
Step 3 : I have zoomed in on the image with the Zoom Tool
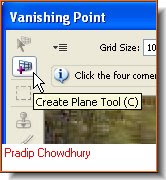
Step 4 : Click the Create Plane Tool or just press 'C'.
Step 5 : As soon as you click the Create Plane Tool the cursor will change as above.
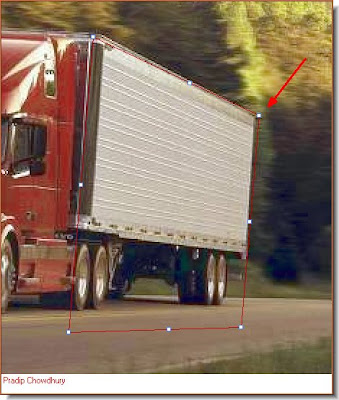
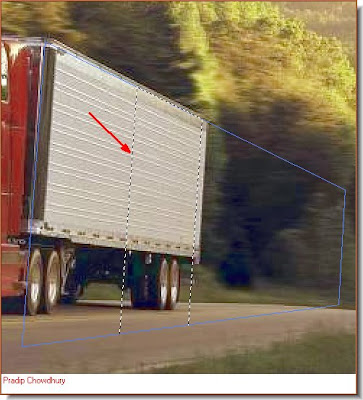
Step 6 : I have clicked on a corner of the Truck's body and then dragged till I have a grid as above with the Create Plane Tool. Step 7 : Now with the cursor I have dragged the grid at the back of the truck,
Step 8 : I have clicked the Marquee Tool.
Step 9 : I have drawn a selection with the Marquee Tool. Step 10 : I have set the Feather at 3.
 Step 11 : Press ALT and drag the selection with the cursor. The truck body has been extended and has more wheels.
 Step 12 : I have again pressed ALT and dragged the selection which has further elongated the body and added more wheels.
 Click ok and the truck has a longer body and many more wheels. Try it out. There are more things that can be done with this tool. The second part of the tutorial is here.
Post a Comment