
Let me show you how to make a simple poster with a special effect. I will call it the Shattered Axe Effect. You will need a number of images which you can download. I will give the links.
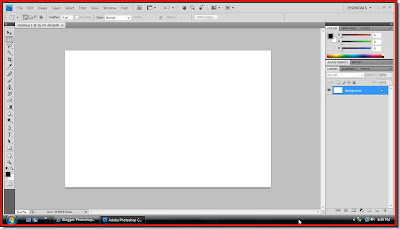 Step 1 : Open a New White Layer in Photoshop.
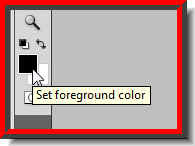 Step 2 : Click on the Foreground Color.
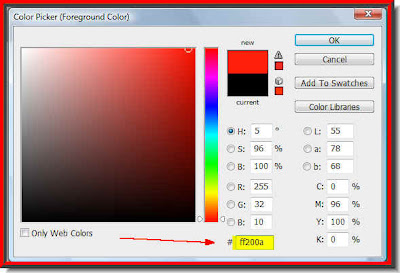 Step 3 : In the box shown by the red arrow type in ff200a. This is a bright red color. Click ok.
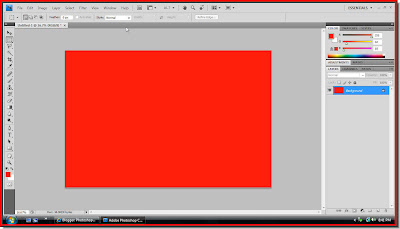 Step 4 : Press ALT+BACKSPACE and the White layer will fill with the chosen color.
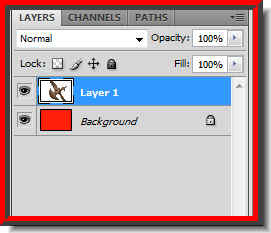
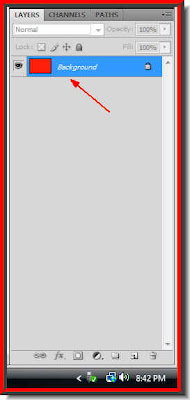 Note that there is only a single layer in the Layers pallette.
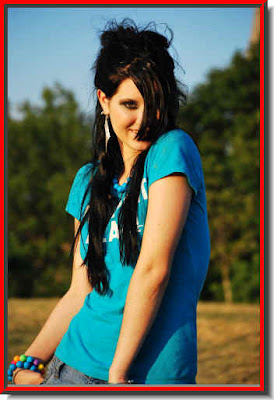
 I have opened this free stock image. You can download it here. You will only need to register.
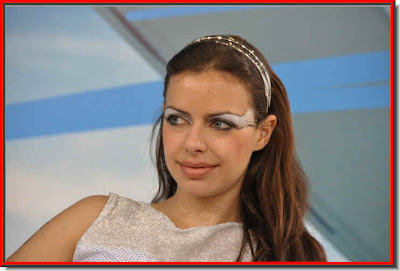
 And this. You can download it here.
 And this. You can download it here.
 And this. You can download it here. You can of course use your own images.
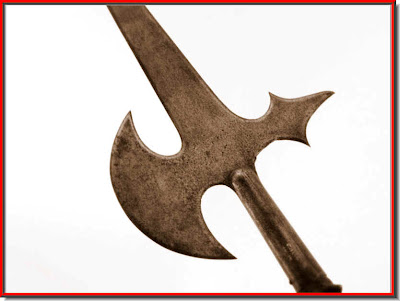
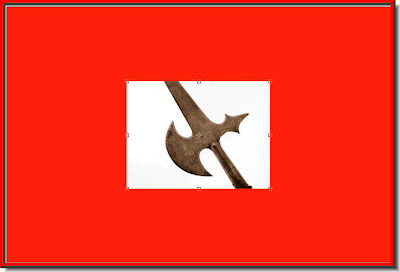
 Step 5 : Open the axe image press CTRL+A. A column of marching ants will immediately surround the edges of the image. Now press CTRL+C.
 Step 6 : Go to the Red layer image and press CTRL+V. The axe photo will be pasted on the Red layer.
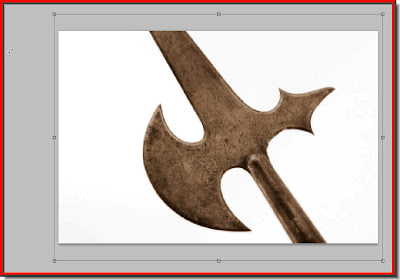
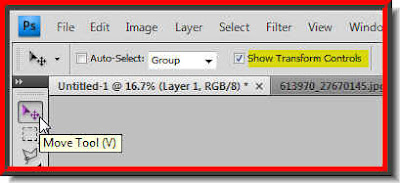 Step 7 : Click the Move Tool and check the 'Show Transform Controls'. It is called Bounding Box in Photoshop 7 and is found in the same place. It is very important to do this otherwise you will not be able to see the corner handles around an image.
 You can see the corner handles now.
 Step 8 : Press SHIFT+ALT and drag any of the corner handles. It will increase in size proportionately till it covers the entire layer underneath.
Step 1 : Open a New White Layer in Photoshop.Step 2 : Click on the Foreground Color.Step 3 : In the box shown by the red arrow type in ff200a. This is a bright red color. Click ok.Step 4 : Press ALT+BACKSPACE and the White layer will fill with the chosen color.Note that there is only a single layer in the Layers pallette.I have opened this free stock image. You can download it here. You will only need to register.And this. You can download it here.And this. You can download it here.And this. You can download it here. You can of course use your own images.Step 5 : Open the axe image press CTRL+A. A column of marching ants will immediately surround the edges of the image. Now press CTRL+C.Step 6 : Go to the Red layer image and press CTRL+V. The axe photo will be pasted on the Red layer.Step 7 : Click the Move Tool and check the 'Show Transform Controls'. It is called Bounding Box in Photoshop 7 and is found in the same place. It is very important to do this otherwise you will not be able to see the corner handles around an image.You can see the corner handles now.Step 8 : Press SHIFT+ALT and drag any of the corner handles. It will increase in size proportionately till it covers the entire layer underneath.Step 9 : Now click the tick mark in the top panel to apply the transformation.
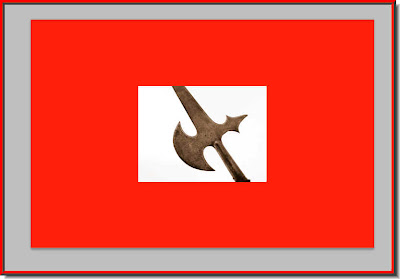
 In the Layers pallette you will find the axe image sitting on the red layer.
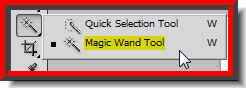 Step 10 : Click on the magic Wand Tool.
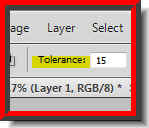 Step 11 : The Tolerance in the top panel is set to 32 by default. Lower it to 15.
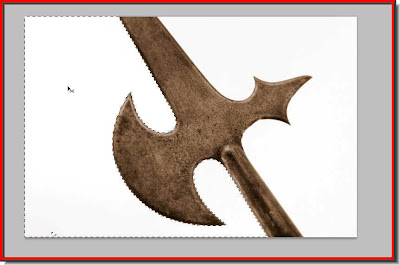 Step 12 : I have clicked on the left side of the axe on the white background. A selection of marching ants immediately forms.
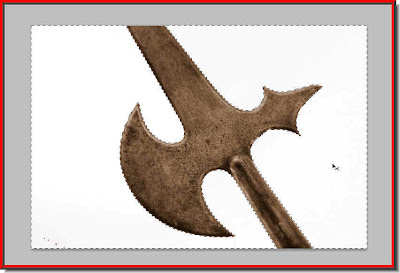 Step 13 : Press SHIFT and click on the right side. The marching ants now cover this side too.
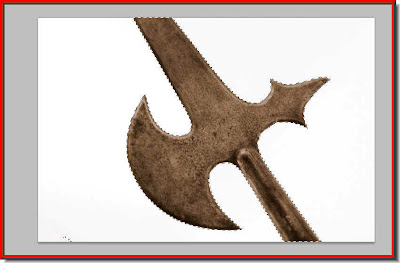 Step 14 : Press CTRL+SHIFT+I. This will inverse the selection. The axe is now selected.
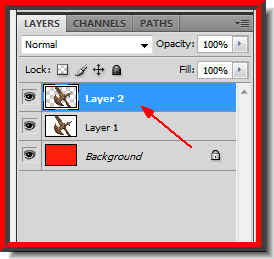 Step 15 : Press CTRL+J. The selection of the axe will be cut and pasted into a new layer -- Layer 2.
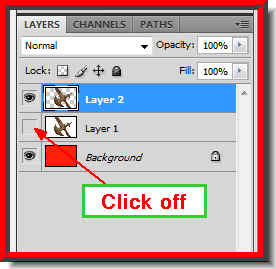
Step 16 : Now click off the eye icon on Layer1.
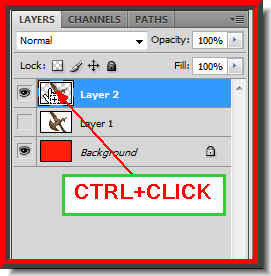 Step 17 : Click on Layer 2 and CTRL+CLICK the layer thumbnail.
 Step 18 : Click above on the small black square above the Foreground Color to set it back to the default Black.
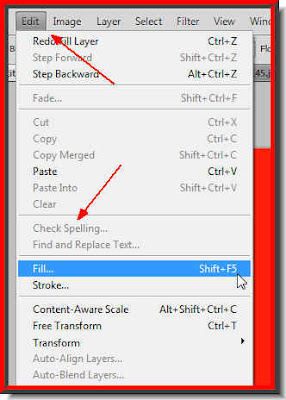 Step 19 : Go to Edit>Fill.
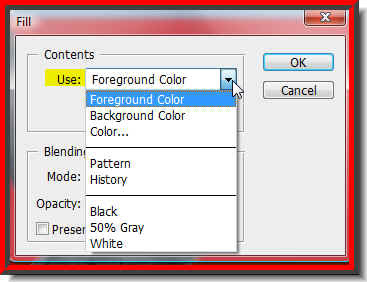 Step 20 : When the Fill dialogue box opens Change 'Use' to Foreground Color if it is not set as such. Click ok.
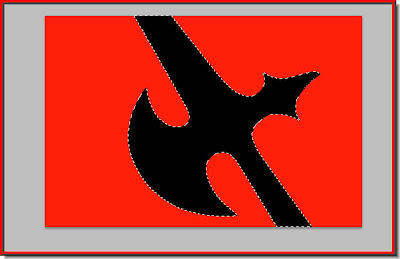 Step 21 : The selection of the axe fills with Black.
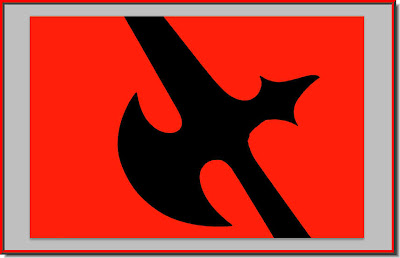 Step 22 : Press CTRL+D to get rid of the selection of marching ants.
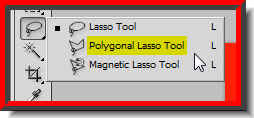 Step 23 : Click on the Polygon Lasso Tool.
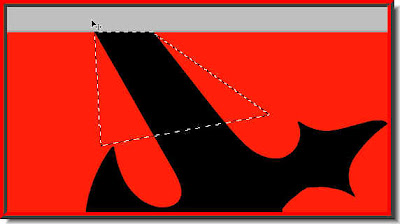 Step 24 : Draw a selection with the Polygon Lasso Tool.
 Step 25 : Click on the Move Tool.
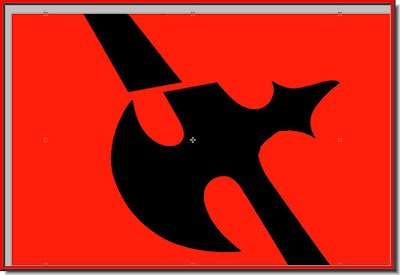 Step 26 : Move the selection with the Move Tool and press CTRL+D to deselect.
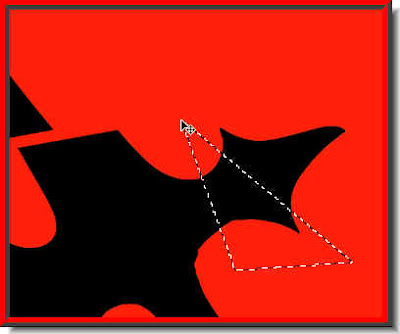 Step 27 : Make another selection with the Polygon Lasso Tool at another place.
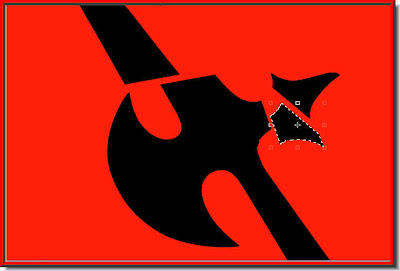 Step 28 : Move the selection and press CTRL+D to deselect.
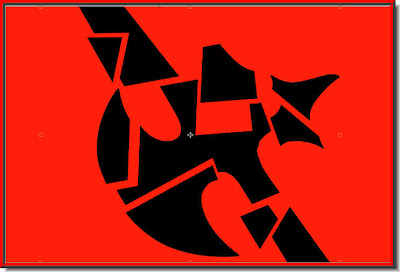 Follow the same process to break up the axe.
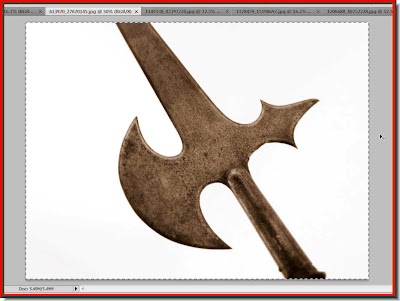
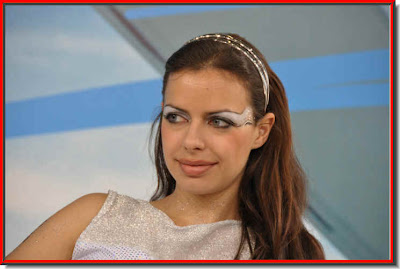 Step 29 : I have now opened this photo.
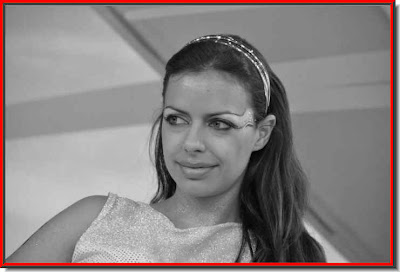 Step 30 : Press CTRL+SHIFT+U. This will desaturate the image.
 Step 31 : Do the same for the other two images.
 Step 32 : I have opened this photo again and pressed CTRL+A (Select All). Then CTRL+C (Copy).
 Step 33 : I have gone to the poster or red layer and pressed CTRl+V (Paste). The photo has been posted on top of the red layer. Since this photo is large it entirely covers the red layer.
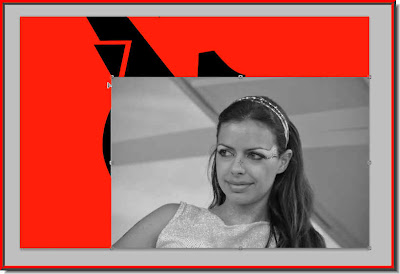 Step 34 : Click the Move Tool and make sure that 'Show Transform Controls' in the top panel is checked. You will find a selection around the image. Press SHIFT+ALT, grab a corner handle and you will be able to resize the image proportionately.
 Step 35 : After resizing the image suitably. Hover your cursor near any of the corner handles. You will see a small bent arrow appear (not shown here). You will be able to rotate the photo with this arrow. Rotate it as shown.
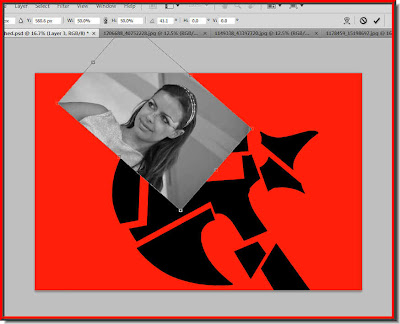 Step 36 : Resize it even further by pressing SHIF+ALT and dragging on a corner handle.
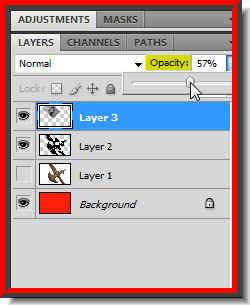 Step 37 : Now look in the Layers pallette. The image we are working on is on Layer 2. Note that it is highlighted. The current layer is always highlighted. Now drag down the Opacity slider till you can see the axe behind the image.
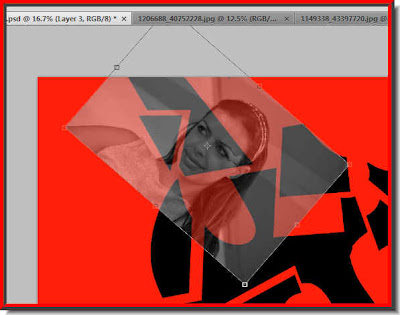 Step 38 : The object of lowering the opacity to see that the eyes are positioned on the axe.
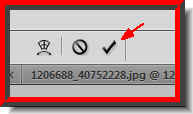
Step 39 : Now drag back the Opacity to 100%. Step 40 : Now click the Tick mark at the right of the top panel to apply the transformation.
 Step 41 : Following the same steps copy and paste the other two photos onto to the axeimage.
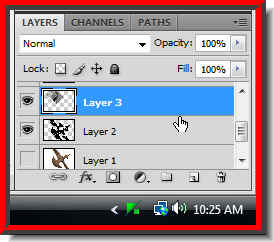
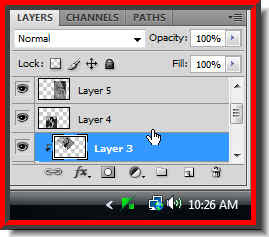
This is how the Layers pallette looks like. Note that the top layer in highlighted. It means we are on this layer.
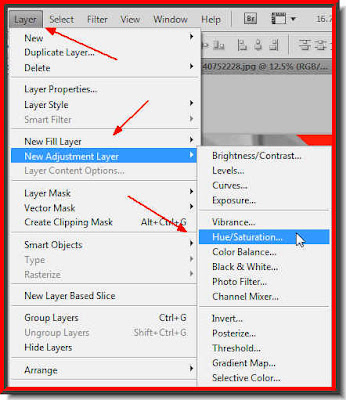 Step 42 : Go to Layer>New Adjustment>Hue/Saturation.
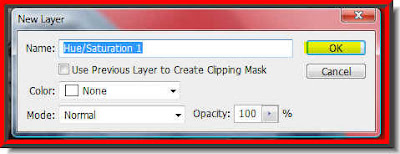 Step 43 : This dialogue box appears. Click ok.
Look in the Layers pallette. The Hue/Saturation Adjustment layer appears.
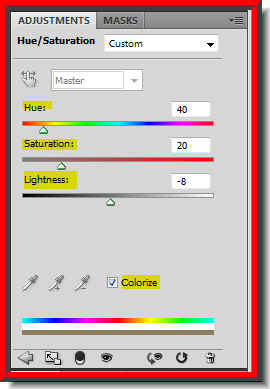
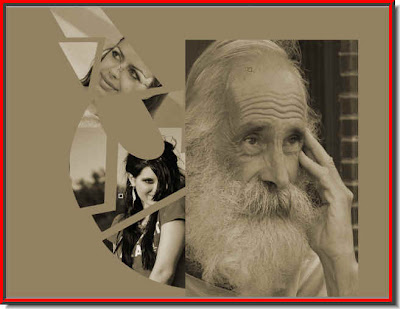
Step 44 : In the dialogue box check Colorize. First drag the Hue slider to right a little at a time. I want a sepia tone. You can choose any color you want. Then drag the Saturation slifgtly to the left to increase the Saturation. Lastly drag the Lightness slider a little to the left. When ou drag each slider you will be able to see the effect on the image.
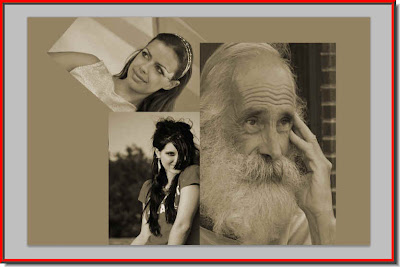
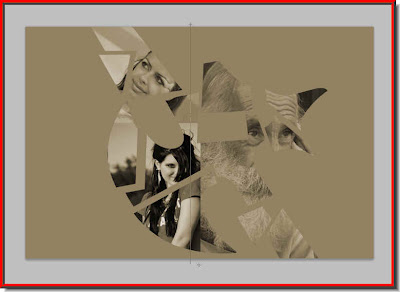
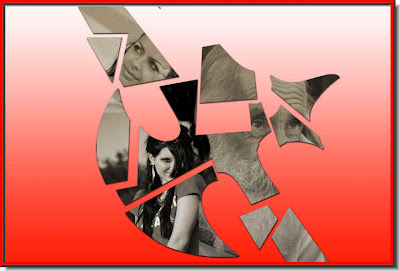
This is the effect I have got. Note that the Background has obliterated the red background. Do not worry that will be fixed later.
Step 45 : Now press ALT and press just at a point between Layer 3and 2. A small black
circle will appear. Let us see what happens.
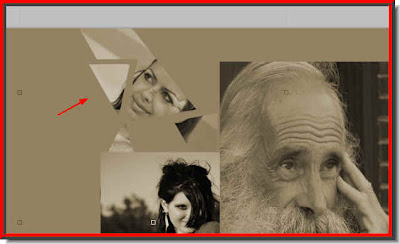
The girls's face has fitted onto the broken axe.
Step 46 : : Now press ALT and click at the border between layer 3 and 4.
The other girl's image fits into the axe.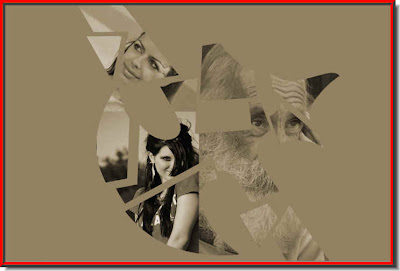
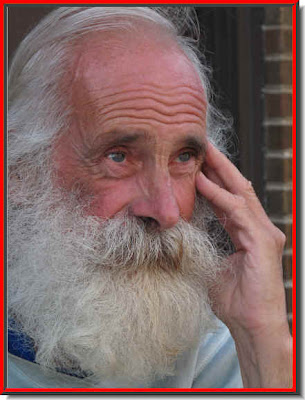
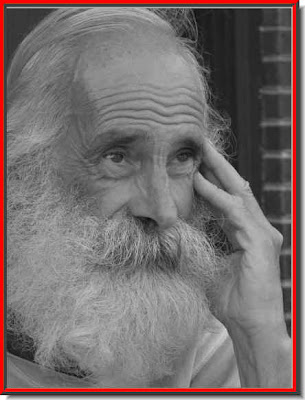
Step 47 : Do the same with the old man's image. 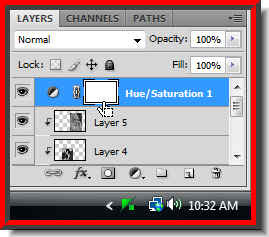
Step 48 : Now click directly on the Layer mask to select it. when you click the Layer Mask a border appears all around it indicating that the Mask has been selected.
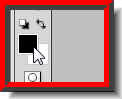
Look at the Foreground and Background Colors. They should be at the default Black Foreground and White Background. It it is not press 'x' and then 'd'.
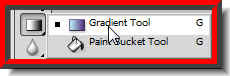
Step 49 : Click the Gradient Tool.
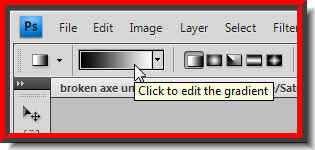
Step 50 : Click where the arrow points to. It will bring up the Gradient Editor.
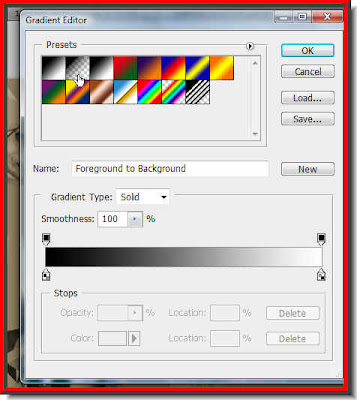
The Gradient Editor comes up. Click on the second Gradient from the top left.
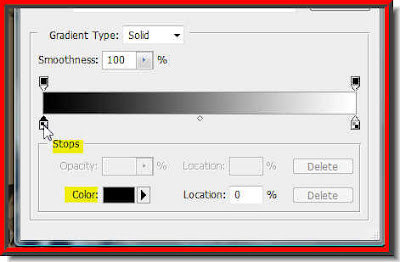
Step 51 : Click on the left bottom Stop and the Color changes to Black. Click on the Black.
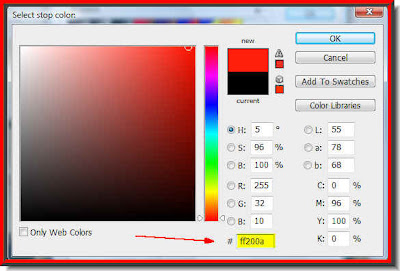
Step 52 : When you clcik on the Black, Select Stop Color dialogue box opens. In the box at the bottom write ff200a. Click ok.
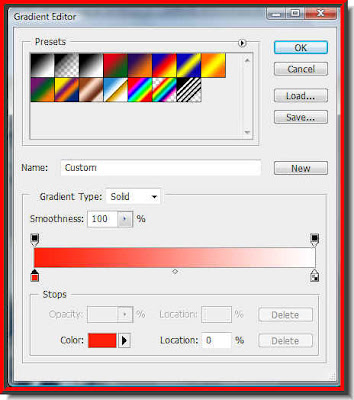
The color changes to a bright red.
Step 53 : Press SHIFT and draw from the top to the bottom. You will find that you can draw in a straight line. Then drag from bottom to top.
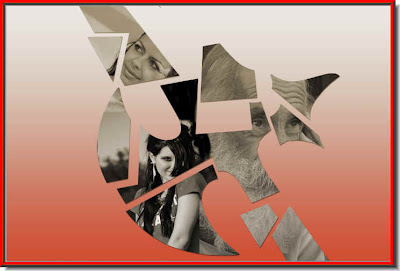 This is the effect I have got.
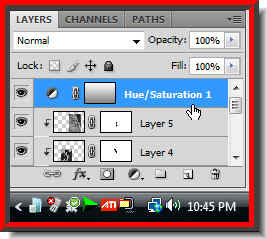 Step 54 : Now press ALT+click on the edge between the Hue/Saturation Layer and Layer 5. A small black dot will form.
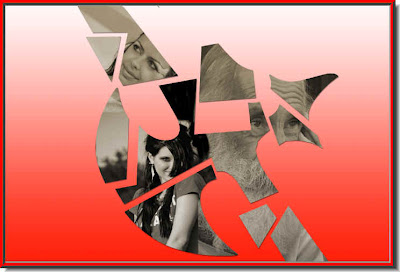 And the image looks like this.
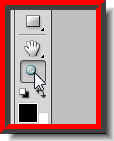 Step 55 : Click on the Zoom Tool to zoom into the image.
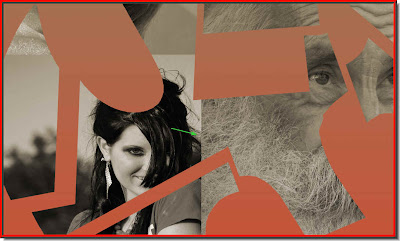 I have zoomed into the image.
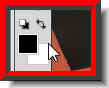 Step 56 : Make sure that the Foreground Color is Black and Background White.
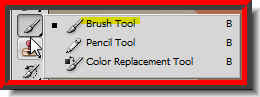 Step 57 : Click on the Brush Tool
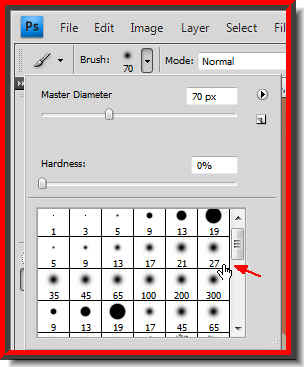 Step 58 : In the top panel at the left click on Brushes to reveal the dropdown. Choose a soft brush. I have chosen Brush no 27. Click on the brush to select it.
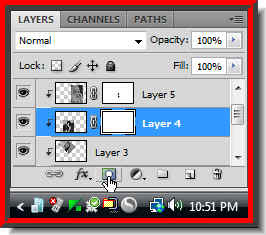 Step 59 : Click Layer 3, Layer 4 and and Layer 5 in turn and after clicking each layer click the Add Layer Msk icon. A layer Mask forms next to the layer thumbnails. You will be able to make out from the layers on which layer the photos of the girls and the old man is.
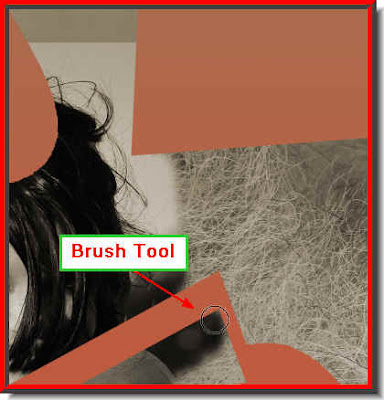 Step 60 : Clicking on the appropriate layer i.e. of the two girls and old man's photo, begin painting with the Brush Tool to remove hard edges where the photos overlap. This will seamlessly the blend the photos without any hard esges.
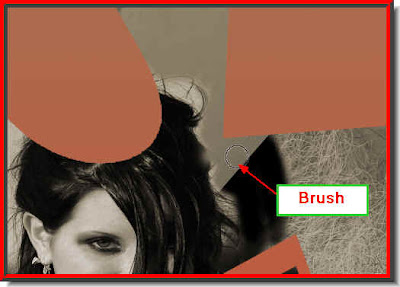 Step 61 : I have now selected the layer the old man is on and have painted away a part of the beard to reveal the hair of the girl underneath it. After working on all three layers zoom out.
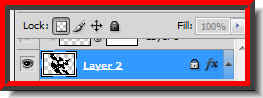 Step 62 : Click on Layer 2 which contains the broken axe.
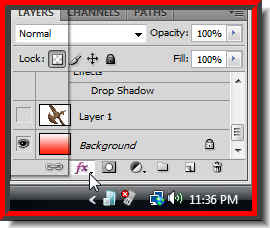 Step 63 : Click on the Add Layer Style button.
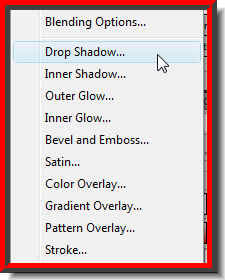 Step 64 : From the popup click on Drop Shadow.
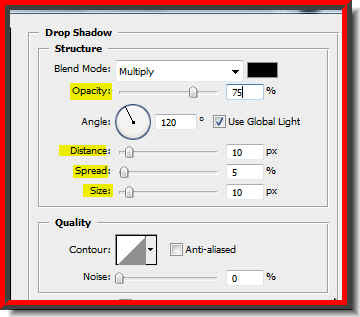 Step 65 : These are settings I have given. It will depend on your image. First drag the distance slider, then the Size and lastly reduce the Opacity whatever settings you give.
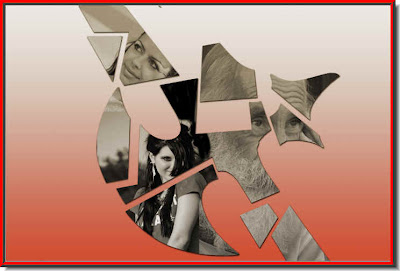
This is the effect that I have got. 
Step 66 : Press ALT and click between the border of Hue/Saturation layer and Layer 5. A black dot appears.
And the red background layer shows through.

Add some text and the poster is complete. Try it out.
Other Photoshop tutorials are here.
Post a Comment