
This is a continuation of the Logo making tutorial. The second part is here. 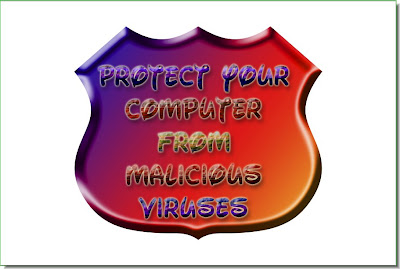
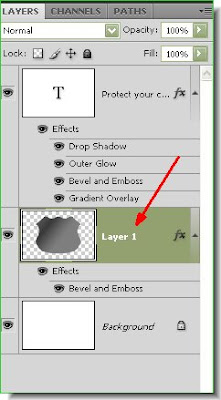 Step 39 : Click on Layer 1, which is the Shield. Then Press CTRL+SHIFT+U. The shield immediately loses all trace of color and becomes a black and white image.
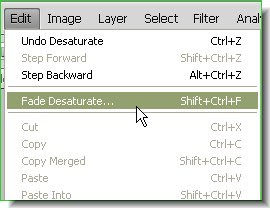 Step 40 : Go to Edit>Fade Desaturate.
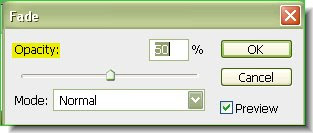 Step 41 : When the Fade dialogue box opens reduce the Opacity by 50 %. Click ok.
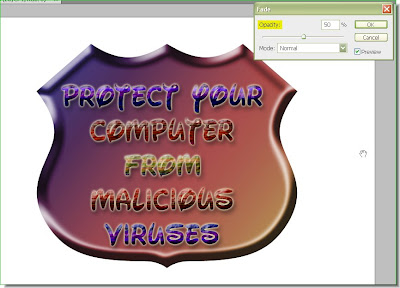 This is how the image looks like. The text looks more prominent as the shield no longer is as bright as before.
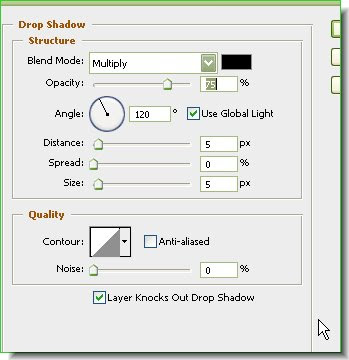
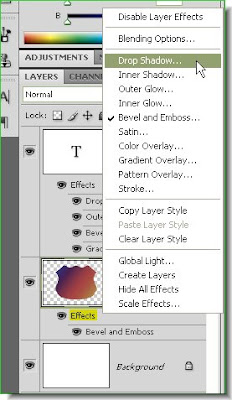 Step 42 : Click the Effects in Layer 1. From the popup click on Drop Shadow.
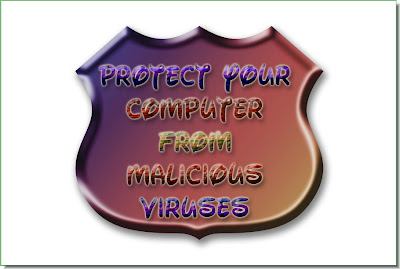 The Drop Shadow has been added.
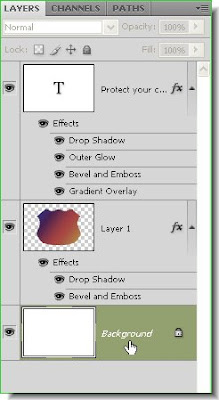 Step 44 : Click on the White Background layer.
 Step 45 : Add some text to the Background layer. I have entered my text.
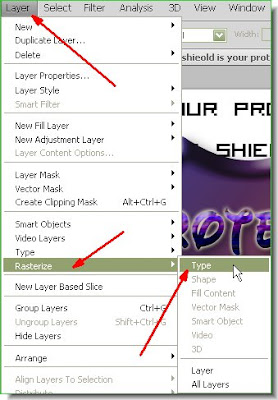 Step 46 : Go to Edit>Rasterize>Type.
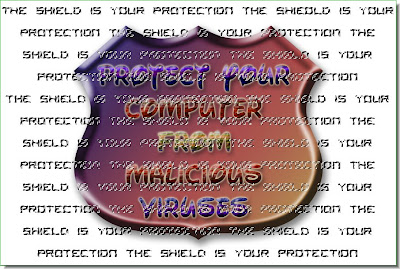
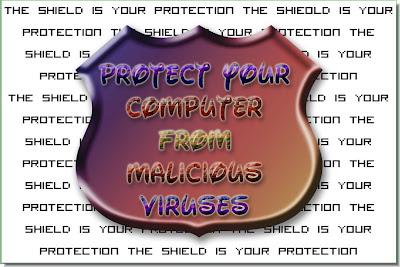
 Step 51 : This is how the image looks. Press CTRL+D to deselect and the 'marching ants go away.
  Step 52 : Go to Filter>Distort>Spherize.
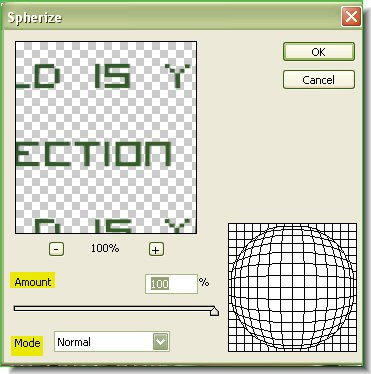 Step 53 : The Spherize dialogue box open. Drag the Amount slider to 100%. The Mode should be Normal.

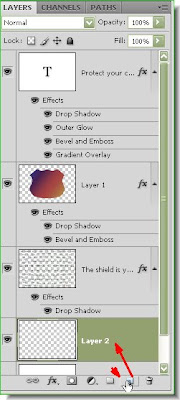 Step 56 : Remembr you were working on the layer below the Shield Layer. Keeping CTRL pressed click the Add New Layer button. This forms a blank layer below the Rasterised text layer.
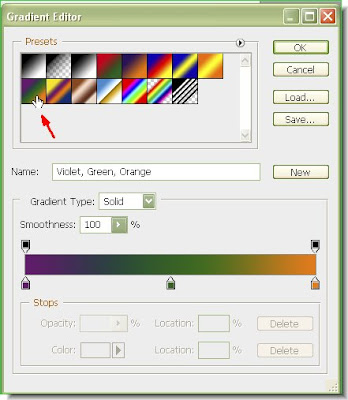
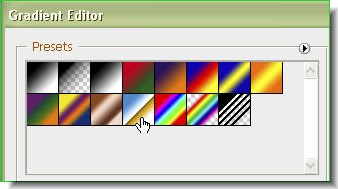 Step 57 : I have chosen a new Gradient by clicking on it.
 Step 58 : I have applied the Gradient.
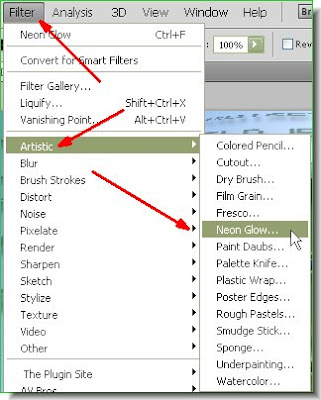 Step 59 : I have gone to Filter>Artistic>Neon Glow.
Step 60 : The Neon Glow Dialogue box opens.
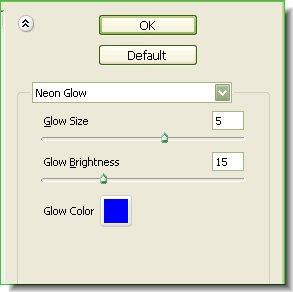 Step 61 : I am leaving it at the default settings and clicking ok.
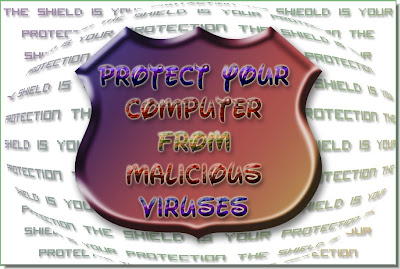
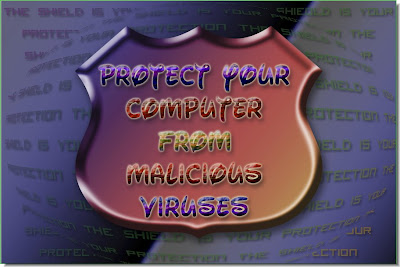 The finished Logo. I have shown just what can be done. You can use a different Shape and different Gradients and Text and Layers Styles and come up with your own Logo. That's all for now.
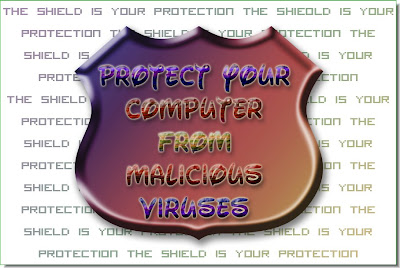
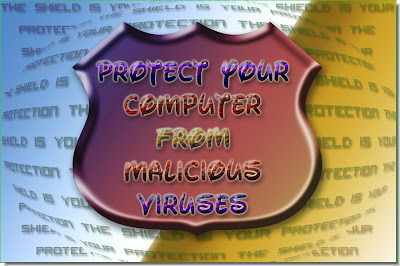
This is how the logo looks so far.
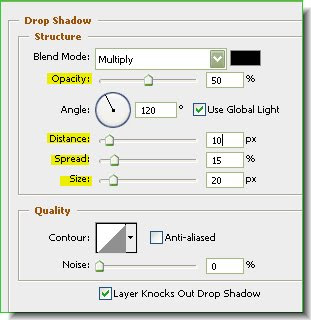
Step 39 : Click on Layer 1, which is the Shield. Then Press CTRL+SHIFT+U. The shield immediately loses all trace of color and becomes a black and white image. Step 40 : Go to Edit>Fade Desaturate. Step 41 : When the Fade dialogue box opens reduce the Opacity by 50 %. Click ok. This is how the image looks like. The text looks more prominent as the shield no longer is as bright as before.Step 42 : Click the Effects in Layer 1. From the popup click on Drop Shadow.Step 43 : In the Drop Shadow dialogue box I have set the Distance, Size and Spread sliders, then reduced the Opacity by 50%. Click ok.
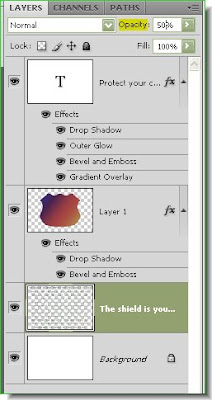
The Drop Shadow has been added.Step 44 : Click on the White Background layer.Step 45 : Add some text to the Background layer. I have entered my text.Step 46 : Go to Edit>Rasterize>Type.
Step 47 : The text has been Rasterized. You can make it out in the Layer thumbnail. Now CTRL+CLICK the layer thumbnail.
You will find the Text surrounded by 'marching ants'.
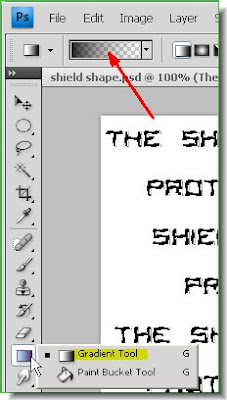
Step 48 : Click on the Gradient Tool and click the Gradient Editor in the top panel.
Step 49 : The Gradient Editor comes up. I have clicked on a particular Gradient. Apply theGradient to the rasterized Text layer.
Step 50 : Now reduce the Opacity of the Layer to 50 %.
Step 51 : This is how the image looks. Press CTRL+D to deselect and the 'marching ants go away. Step 52 : Go to Filter>Distort>Spherize.Step 53 : The Spherize dialogue box open. Drag the Amount slider to 100%. The Mode should be Normal.
This is how the Image looks after applying the Spherize filter.
Step 54 : Click the Add Layer Style button and from the popup choose Drop Shadow.
Step 55 : I have left the default settings in Drop Shadow dialogue box and clicked ok.
The Drop Shadow has been added.
Step 56 : Remembr you were working on the layer below the Shield Layer. Keeping CTRL pressed click the Add New Layer button. This forms a blank layer below the Rasterised text layer. Step 57 : I have chosen a new Gradient by clicking on it.Step 58 : I have applied the Gradient. Step 59 : I have gone to Filter>Artistic>Neon Glow.
Step 60 : The Neon Glow Dialogue box opens.
Step 61 : I am leaving it at the default settings and clicking ok.The finished Logo. I have shown just what can be done. You can use a different Shape and different Gradients and Text and Layers Styles and come up with your own Logo. That's all for now.
Post a Comment