
These days of color photographs have moved a long way from those black and white images. Sometimes you may want to give a vintage look to a color photo as a spcial effect. It is not at all difficult. It can be done in any version of Photoshop. Just follow the steps below.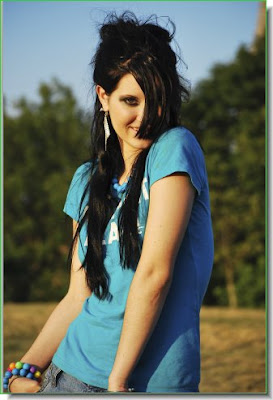 Step 1 : I have opened this free stock photo in Photoshop. You can download this photo from here.
Step 1 : I have opened this free stock photo in Photoshop. You can download this photo from here.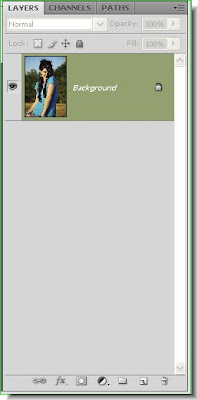 The Layers pallette looks like this. The photo of the girl is the Background Layer.
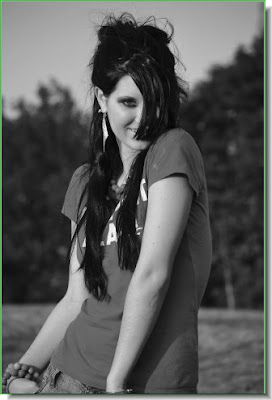 Step 2 : Press CTRL+SHIFT+U. This will desaturate the image.
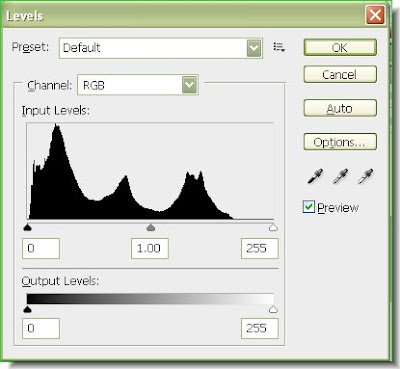 Step 3 : Press CTRL+L. This will bring up the Levels dialogue box.
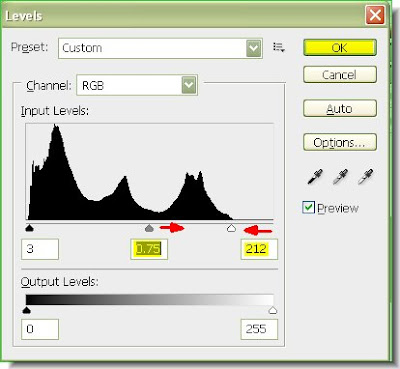 Step 4 : I have dragged the White slider at the left to the edge of the black graph. I have then dragged the Grey slider a little to the right. This is to darken the highlights. Click ok.
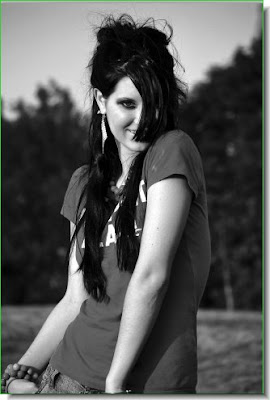 The image has been darkened.
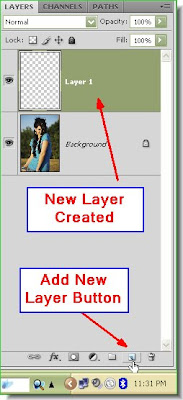 Step 5 : In the Layers pallette click the 'Create New Layer' button. A new Layer 1 forms above the Background layer.
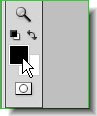 Step 6 : Click the Foreground Color.
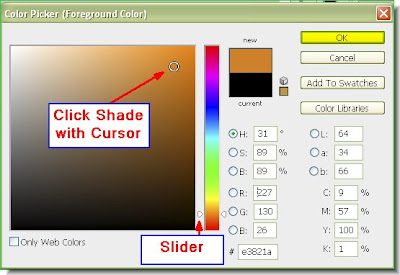
Step 7 : This brings up the Color Picker. The column in the middle is called a Spectrum. You will find a slider at the bottom of Spectrum. Drag it up with the cursor till the color changes to Orange. The Color I have chosen is 'e3821a' . You can alternately enter the value in the box at the bottom marked with #. Click ok.
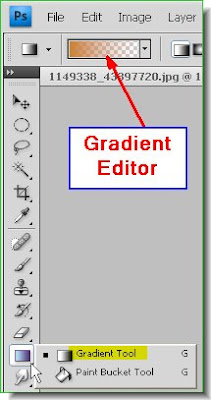 Step 8 : Now click on the Gradient Tool from the flyout. Look at the top. You will find the Gradient Editor. You don't have to open it for this tutorial.
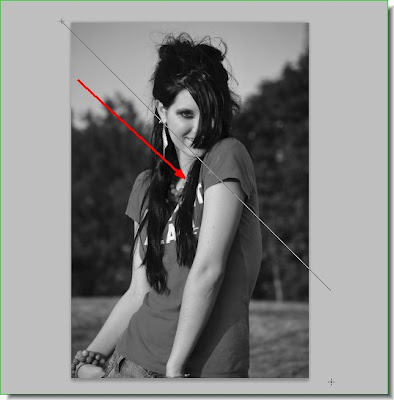 Step 9 : Draw diagonally from left top to right botom.
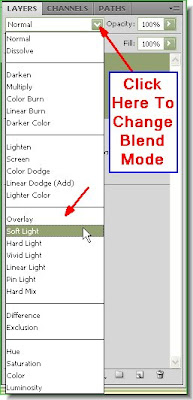 Step 10 : In the Layers pallette now change the Blend Mode from the drop down menu. It can be accessed when you click where the arrow points to. Click on Soft Light.
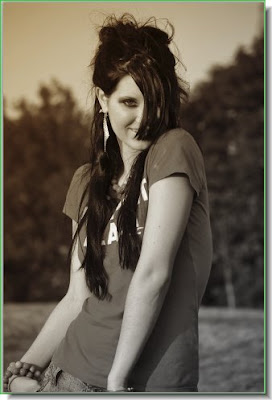 This is how the image looks after changing the Blend Mode.
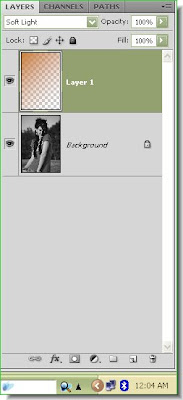
This is how the Layers pallette looks.
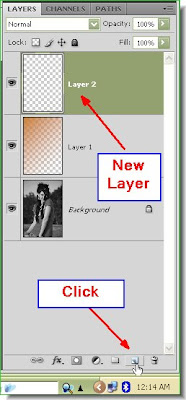 Step 11 : Click the Create New layer button again. A new Layer 2 forms above Layer 1.
 Step 12 : Click the Foreground Color. Note it is showing the last color picked.
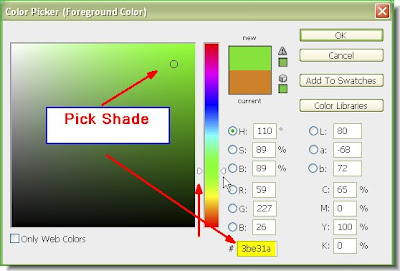 Step 13 : The Color Picker comes up. Drag the slider up the Spectrum till the color changes to Green. I have picked on a shade of green. Alternately you can enter '3be31a' in the highlighted box at the bottom.
The Foreground Color changes to the color picked.
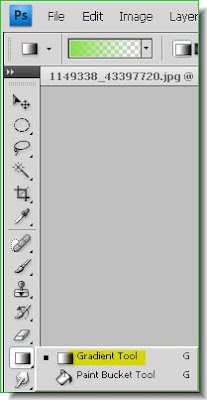 Step 14 : Click the Gradient Tool again.
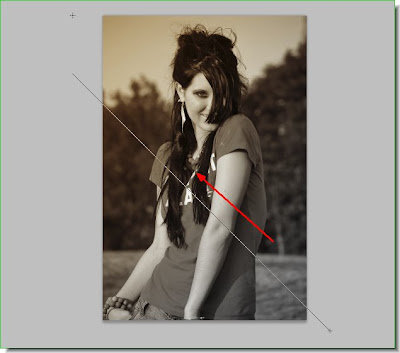 Step 15 : Drag with the Gradient Tool from the right bottom to the top left.
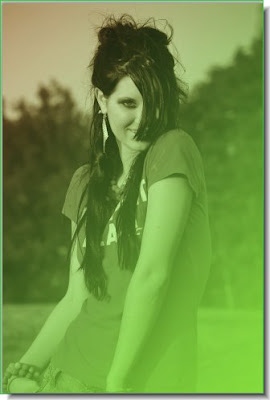 This is how the image looks.
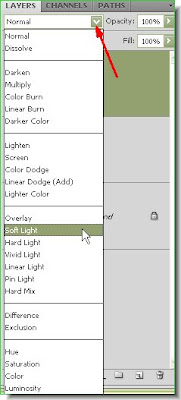 Step 16 : Change the Blend Mode to Soft Light.
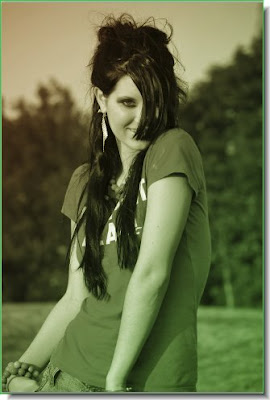 This is how the image looks.
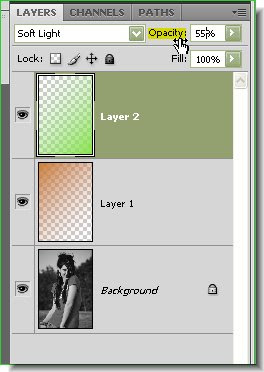
Step 17 : Reduce the Opacity of Layer 2 to 55 % by dragging the slider at the bottom or entering 55% in the little box.

The finished image. You can use any color for the Gradients. It is up to you.
Post a Comment