
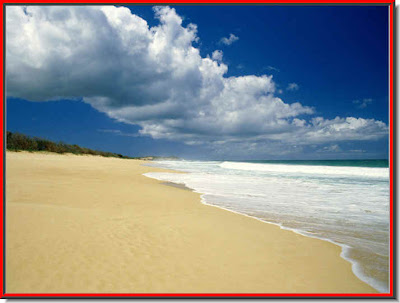
 Step 1 : I have opened this photo in Photoshop. Find a similar photo and just follow along.
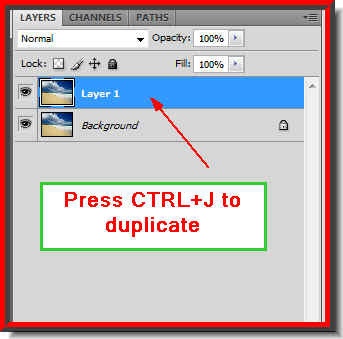 Step 2 : Press CTRL+J to duplicate the Background Layer to Layer1.
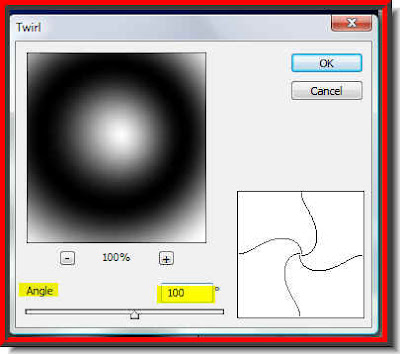
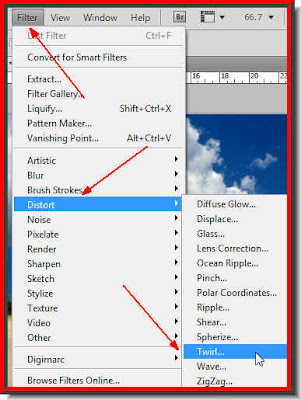 Step 3 : Go to Filter>Distort>Twirl.
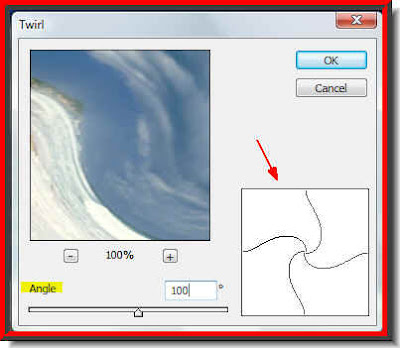

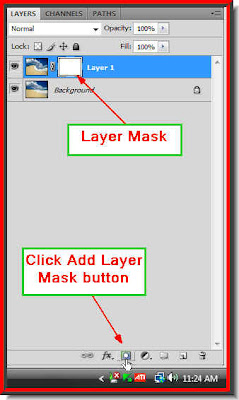 Step 5 : Click the Add Layer Mask button. A Layer Mask forms next to the layer thumbnail on Layer1.
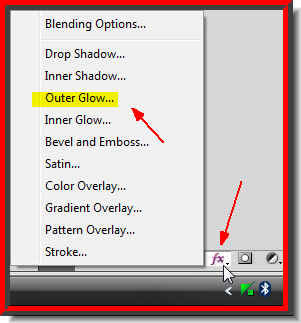
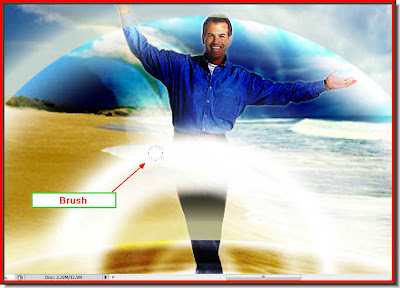
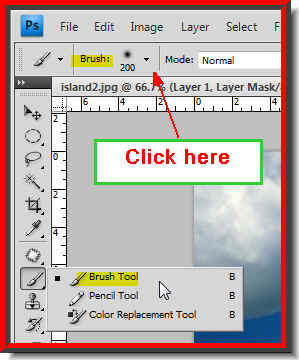 Step 6 : Click the Brush Tool. Click where the arow points to.
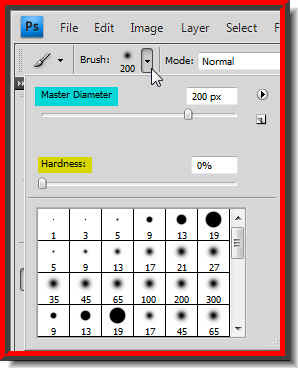 Step 7 : As soon as you click the default Brush presets dialogue box opens. Set the Hardness to zero. This means I am going to use a Brush with the softest tip possible. The Master Diameter you can set suitably depending on your image. I have set it at 200. You can change the diameter by dragging the slider.
  Step 8 : Make sure that the Foreground Color is Black and background White. If it is not press 'x' and then 'd' on your keyboard.
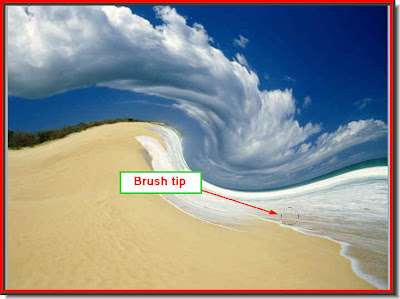 Step 9 : Begin painting. As you paint on Layer1, you are revealing the Layer below. I have begun painting with the Brush at the right bottom of the image.
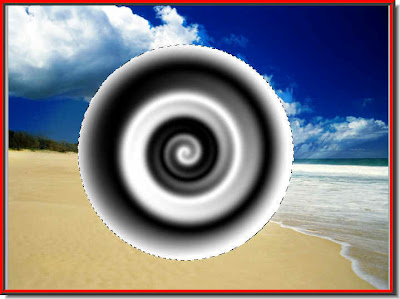
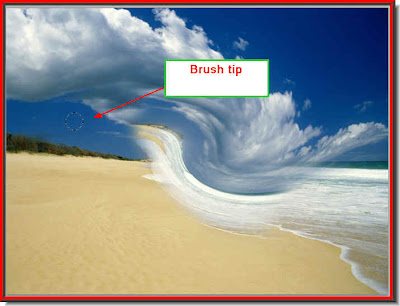 Now I am painting away revealing the horizon of the Background layer at the left.
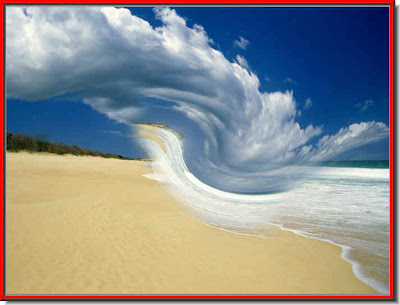 This is how my image looks.
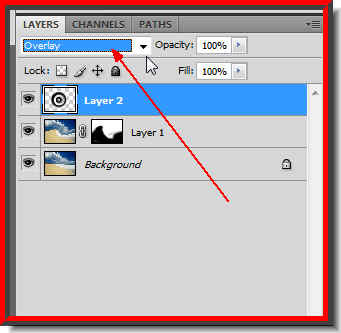
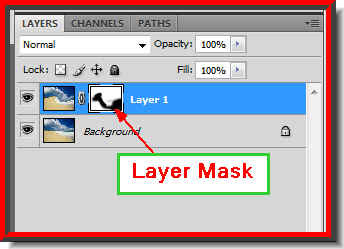 Look in the Layers pallette. Look at the layer mask. The black is what you have painted away on Layer1 to reveal the background layer.
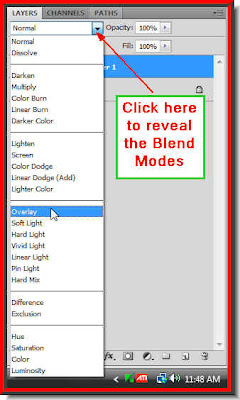 Step 10 : In the layers pallete change the Blend Mode to Overlay from the popup menu. If you are using a different image you may also try Soft Light or Screen or Lighten.
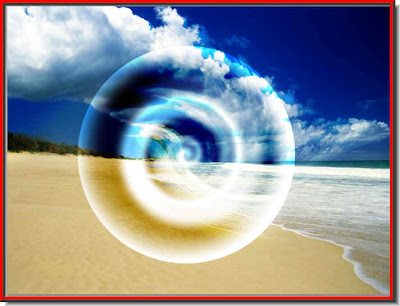
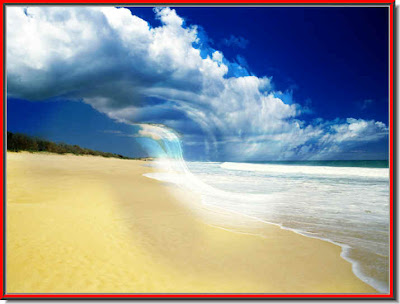 This is how my image looks after changing the Blend Mode to Overlay.
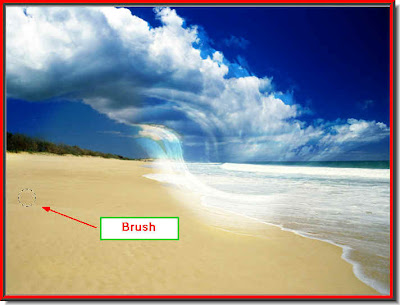
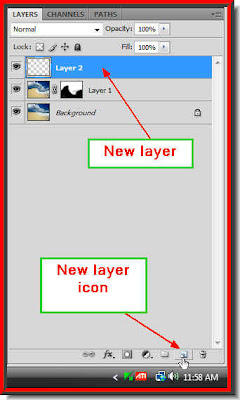 Step 12 : Click the New Layer icon at the bottom of the Layers pallette and a New layer -- Layer 2 forms above layer 1.
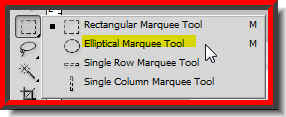 Step 13 : Click the Ellipical Marquee Tool to select it.
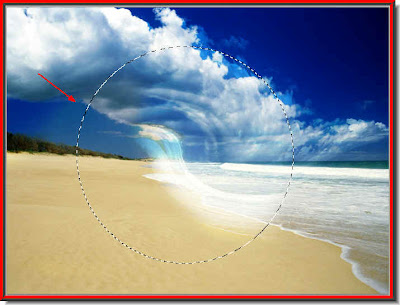 Step 14 : Keep SHIFT pressed and you will be able to draw a perfect circle with the Marquee Tool.
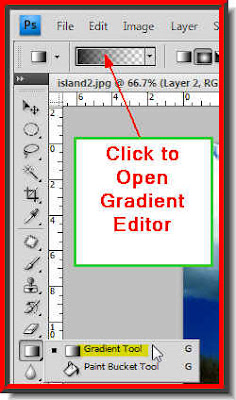
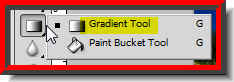
Step 15 : Click the Gradient Tool. Then click the Gradient Editor in the top panel.
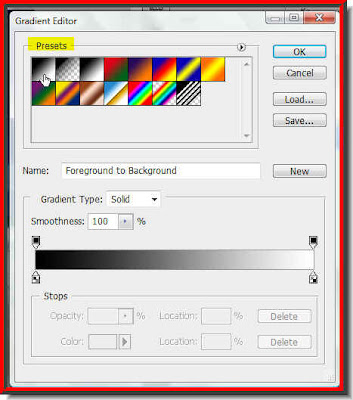
Step 16 : The Gradient Editor opens. Click the first Preset in the top row.
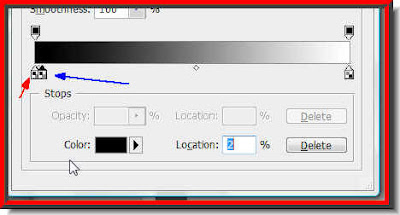 Step 17 : Click the first color stop at the extreme left. Press ALT and drag slightly towards the right. You will find that the stop duplicates into two.
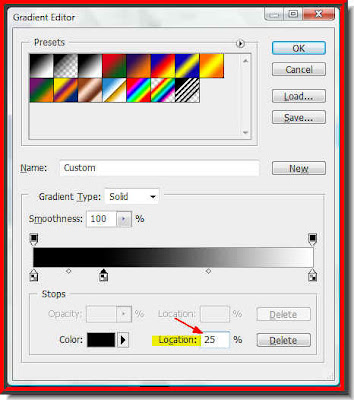 Step 18 : In the Location box type in 25 and the stop moves forward 25%.
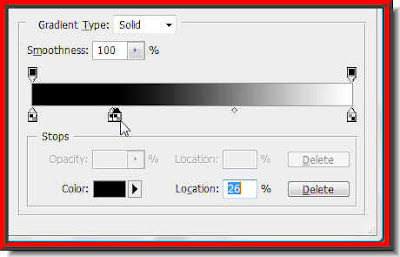
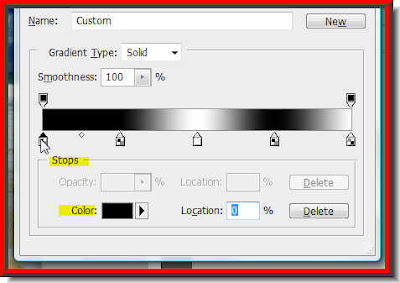
Step 19 : Click the second stop. Press ALT and drag slightly to the right. A new stop forms. Note that it is a Black stop.
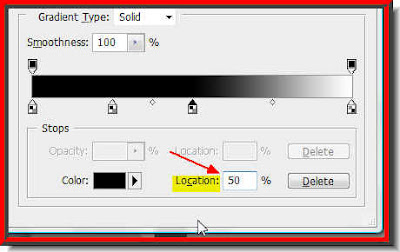
Step 20 : Type 50 in the Location and the thrid stop moves 50% forward.
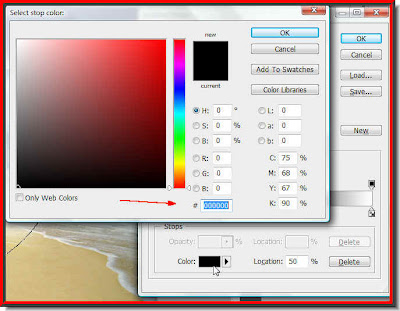
Step 21 : Now click the Stop color at the left bottom. The Select Stop Color dialogue box opens. Type ffffff (6fs) where the red arrow points to.
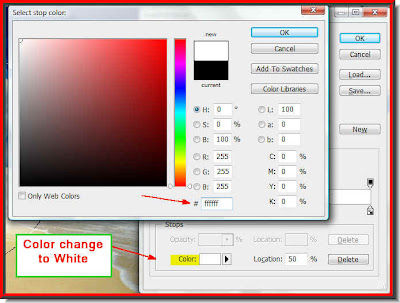
Step 22 : The Color changes to White. Click ok in the Stop Color dialogue box.
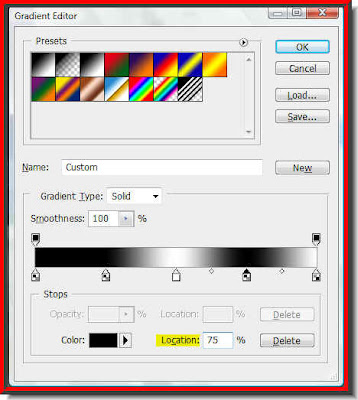
Step 23 : Now press ALT+click the White stop and type 75 in the Location box. The White stop moves 75% forward.
Step 24 : Click on the Extreme left stop. The Color is Black. Click on the Color.
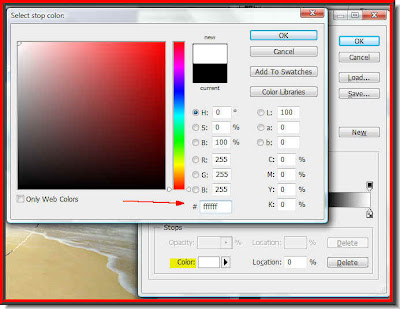
Step 25 : The Color Stop dialogue box opens. Type ffffff and the stop color changes to White. Click ok in the Stop Color dialogue box.
Step 26 : Click the Gradient Tool.
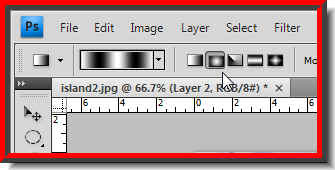
Step 27 : Look at the Gradient Editor. You can see the custom Gradient that has just been created. Also click the Gradient Style (white arrow) in the top panel.
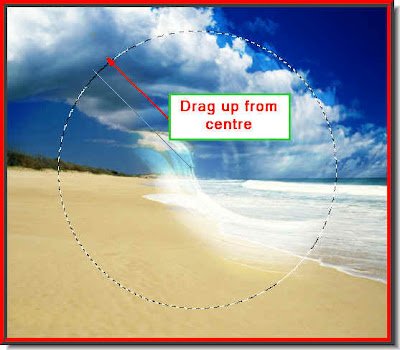
Step 28 : Since the Gradient Tool is selected, choose the midpoint in the circle and drag outwards as shown.
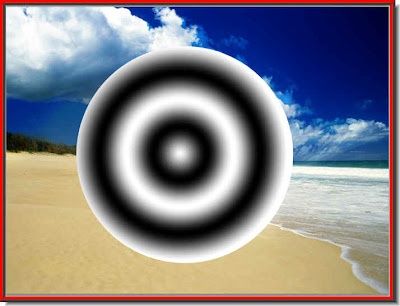
This is the effect you get. DO NOT press CTRL+D to deselect.

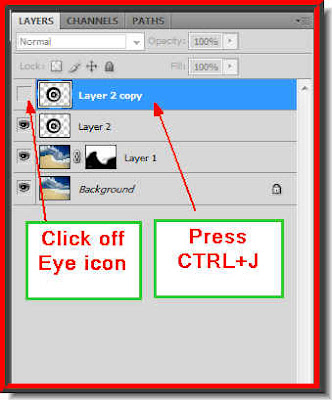 Step 33 : Now press CTRL+J. Layer 2 duplicates in Layer 2 copy. Click off the eye icon of the Layer.
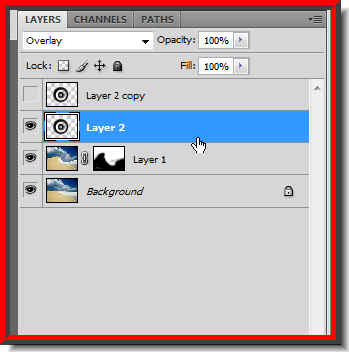 Step 34 : Click back on Layer 2 .
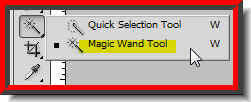
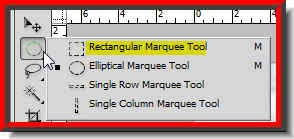 Step 35 : Click on the Rectangular Marquee Tool.
 Step 36 : Draw out a selection with the Rectangular Marquee Tool Just be careful to draw the rectangle a little below the midpoint of the circle.
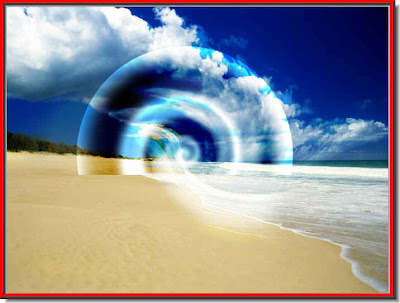
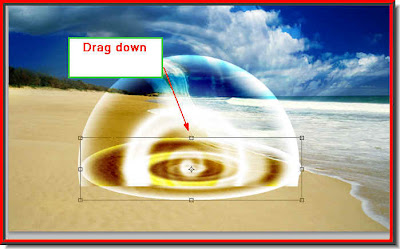
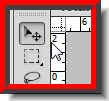 Press 38 : Click the Move Tool.
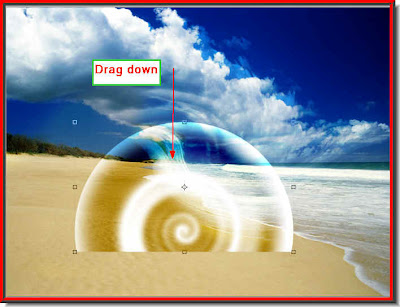 Step 39 : Drag the semi circle down.
Step 40 : Click on Layer 2 and click back the eye icon of the layer.
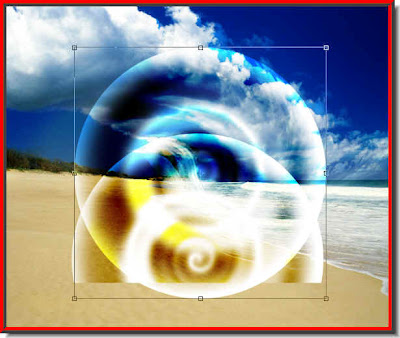
Click 41 : Press CTRL+T. A selection forms around the circle.
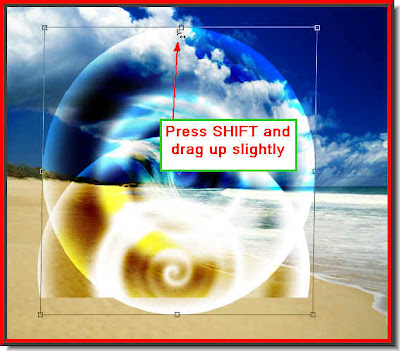
Step 42 : Press SHIFT and drag up the midpoint handle slightly upwards.
Step 43 : Now drag down the midpoint handle keeping SHIFT key pressed.
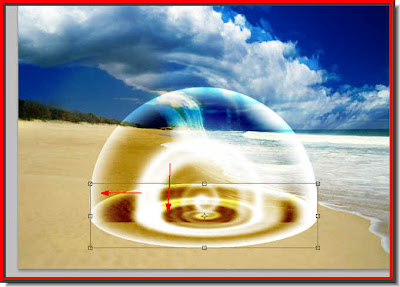
Step 44 : Now to align the circle with the half sphere use the Down and Left Arrow keys on the keyboard till you have a perfect match as shown above.
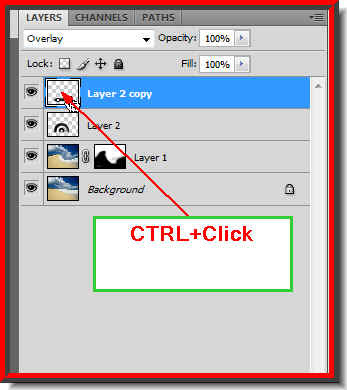
Step 45 : CTRL+Click the Layer thumbnail on Layer 2 copy.
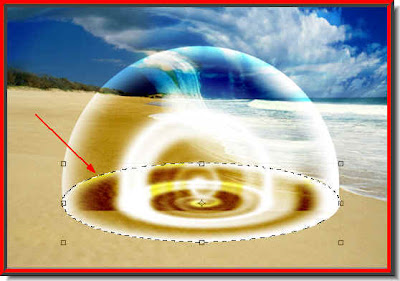
Step 46 : Apply the Twirl Filter with the same settings as earlier, then press CTRL+F around 10 times or till you are satisfied with the result. Press CTRL+D to deselect.


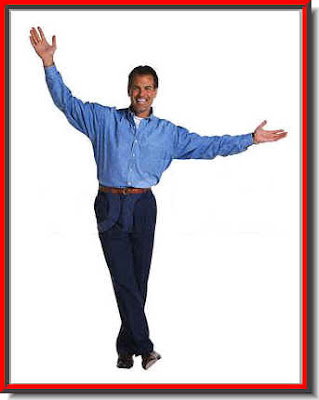
Step 54 : I have opened this photo. I have deliberately chosen a photo with a white background for convenience.


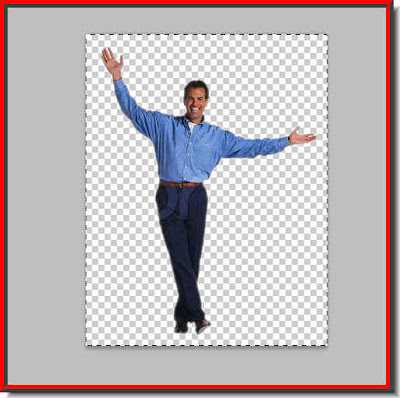 Step 60 : The white background disappears. Now press CTRL+A and then CTRL+C.
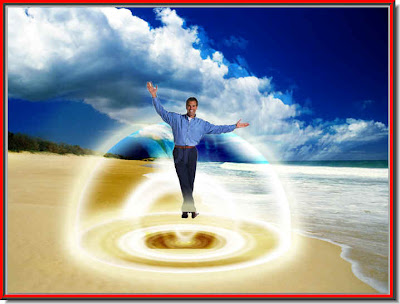
Step 61 : Click the other image and press CTRL+V. The image of the man is pasted on it.
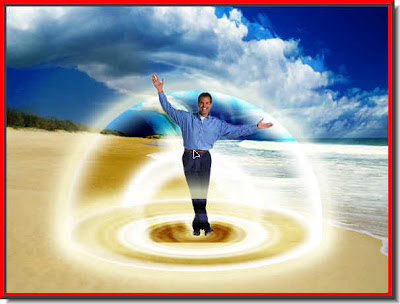
Step 62 : Use the Move Tool to move the man's image into the middle of the vortex.
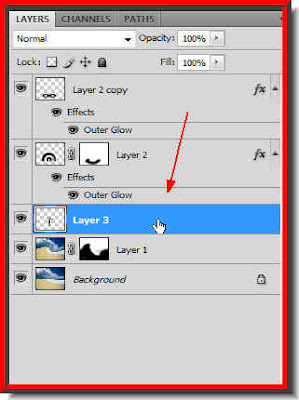
Step 63 : Drag the image of the man below Layer 2 in the Layers pallette.
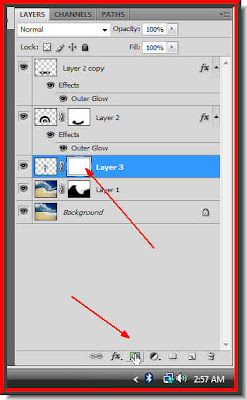
Step 64 : Click the Add Layer Mask button and a layer mask forms next to the Layer thumbnail on Layer 3.
Step 65 : Ensure that the Foreground Color is Black and Background to White. Gently paint away the trousers so that the glow is visible in front.
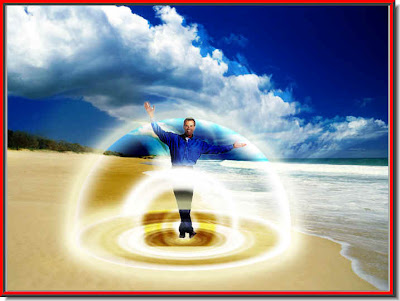
And here is the finished vortex. Try it out.
Other photoshop tutorials are here.
Post a Comment