
Photoshp CS 4 has a new adjustment called Vibrance which is different from Hue/Saturation.. This is not found in even PS CS3. But what does it do? Vibrance prevents skin tones from becoming oversaturated for one, besides it adjusts the saturation so that clipping is minimized as colors near full saturation. Let's see what it actually does with an example. Those of you who do not have CS4 did not worry, I will give a link to a tutorial where you can give the same effect in other versions, including Photoshop7.  Step 1 : I have opened this free stock photo in Photoshop to which I will apply the Vibrance.
Step 1 : I have opened this free stock photo in Photoshop to which I will apply the Vibrance. 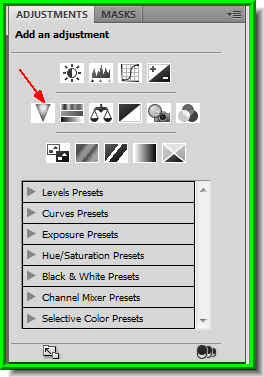 Step 2 : The Vibrance adjustment is found where the red arrow points to.
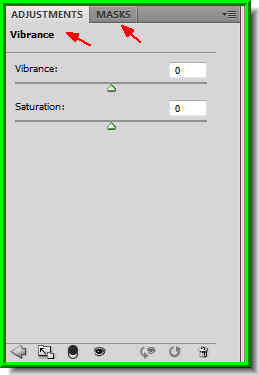 Step 3 : When you click on Vibrance you will see this dialogue box opening. Click on Masks.
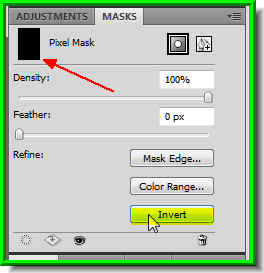 Step 4 : Click on Masks and then on Invert. You will see that the White Pixel Mask change to Black.
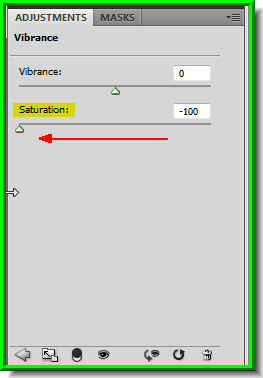 Step 5 : Click back on Adjustments and drag the Saturation slider to -100.
 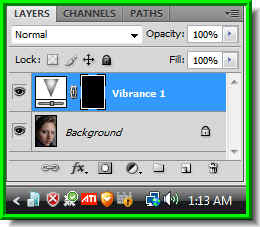 Note : This is how your Layers pallette looks like. The Background photo is not affected when we use the Vibrance, because we are working on an adjustment layer.
 Step 6 : The Foreground Color should be White.
 Step 7 : I have zoomed into the image with the Zoom Tool so I can see the eyes more clearly.
 Step 8 : Now click on the Brush Tool.
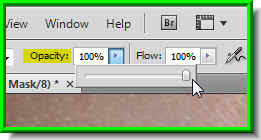 Step 9 : In the top panel change the opacity to 100% or you will not be able to make out what you are doing.
 Step 10 : Now paint with the Brush Tool and all color information disappears.
 I have done the same with the other eye. Both are now Black and White. The rest of the colors in the image are unaffected.
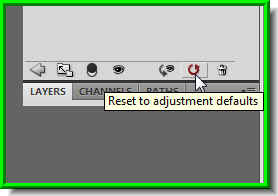 Step 11 : Now click the circle like arrow which sets the adjustments back to default or zero.
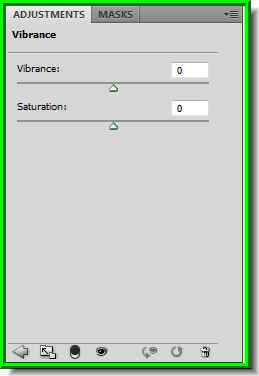 The Vibrance and Saturation sliders are back to zero.
The color also returns to the eyes.
 Step 12 : I have now dragged the Vibrance slider +100 and the Saturation slider to +20. There is nothing hard and fast about these figures. It will depend on your image. It may be more, it may be less.
 The picture op top is the one with Vibrance added and the one at the bottom is the original photo. You can easily make out the difference in the eyes.
 Step 13 : I have now zoomed in on the lips. Let's add some color to it.
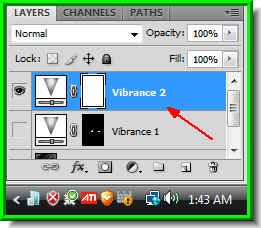 Step 14 : Click on Vibrance and a new adjustment layer Vibrance2 forms in the Layers pallette.
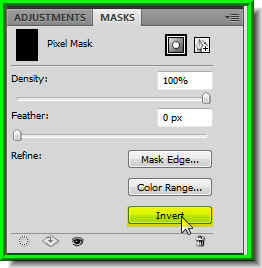 Step 15 : Go to Masks and click on invert.
 Step 16 : The Pixel mask changes to Black and the Foreground changes to White.
Step 17 : Go back to adjustments and drag the Saturation slider to -100.
 Step 18 : Click on the Brush Tool.
 Step 19 : Carefully paint out the color with the Brush Tool. They will become grey.
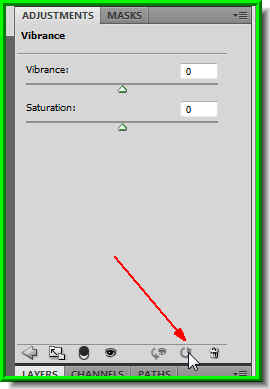 Step 20 : Now reset the Adjustments to default by clicking on the button shown.
 The color returns to the lips.
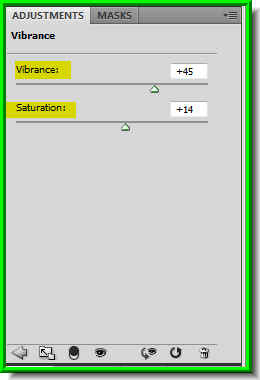 Step 21 : Now keeping an eye on your image first drag the Vibrance slider to the right, then the Saturation slider. These are my settings, but need not be yours. It will depend on your image. By the way, note the arrow at the bottom left. This is to take you back to the Adjustment pallette.
The lips after applying the Vibrance adjustment.

I have zoomed out. This is how the image looks after adding the Vibrance adjustment. Try it out.
Now for those who do not have Photoshop CS4, please see this tutorial, you will be able to achieve the same effect in other versions of PS including PS7.
You can also glamorize a photo with this tutorial.
Other Photoshop tutorials are here.
Post a Comment