

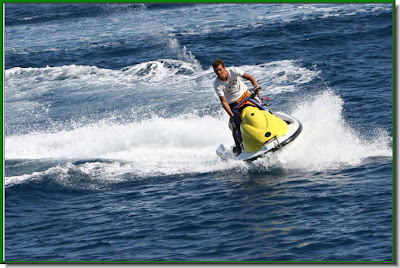 Step 1 : These are the two photos I have download and opened in Photoshop.
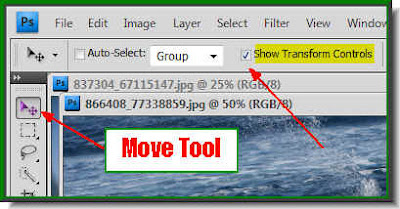 Step 2 : Click the Move Tool and ensure that the 'Show Transform Controls' is checked. It is called Bounding Box in PS7.
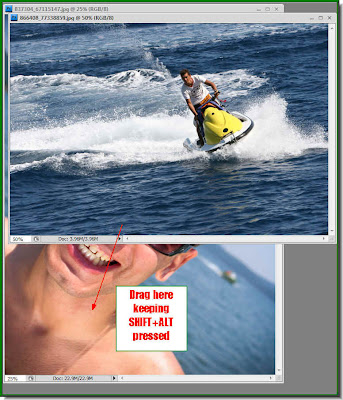 Step 3 : With SHIFT+ALT pressed use the Move Tool to drag the skier's photo onto the man's photo. Keeping the SHIFT+ALT pressed ensures that your photo lands right in the middle proportionately.
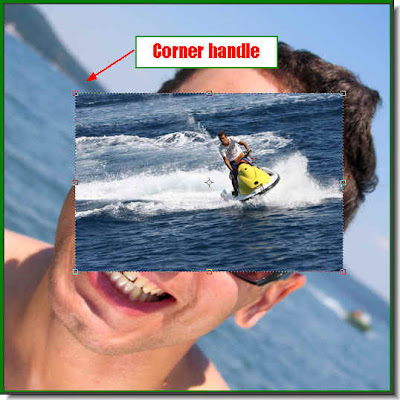 The skier's photo has landed exactly in the middle of the other photo.
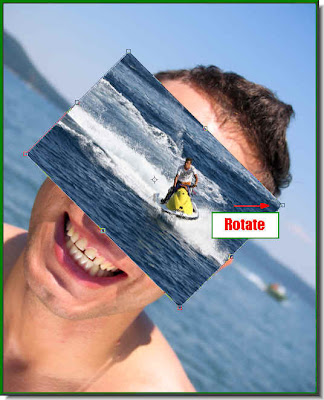


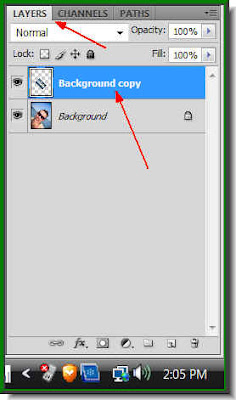
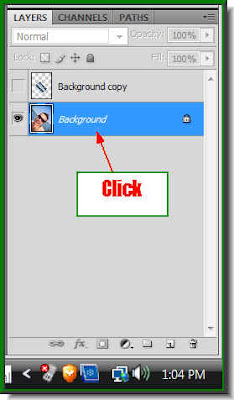 Step 9 : Now click on the Background. It is highlighted immediately, which means you are now on the Background layer.
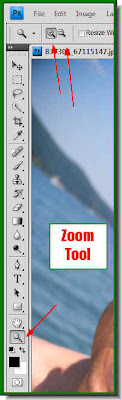 Step 10 : Click on the Zoom Tool. use the icons in the top panel to zoom in and out. I am sure you must know how to use the zoom tool.
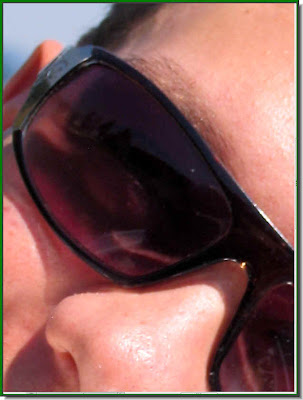 I have zoomed in to be able to see the sunglass clearly.
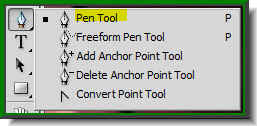 Step 11 : Click on the Pen Tool. Do not throw your hands up in despair at the mention of the Pen Tool. If you have found it difficult to use or have never used it before, let me show you how it can be used easily. Once you know how to use the Pen Tool, you will see that it will become your favourite tool.
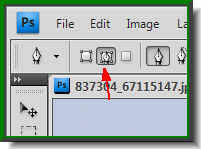 Step 12 : Click this icon in the top panel. It is Paths. You are now set. Nothing difficult so far?
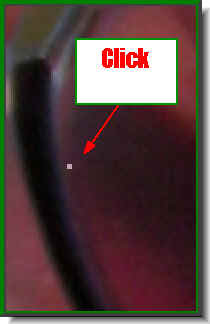 Step 13 : I have zoomed in even more into the image. (My eyesight is not what it was after having seen 54 summers). Click once with the Pen Tool on the inside edge of the sunglass.
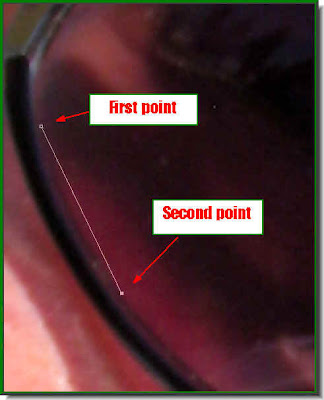 Step 14 : Click a second point. You will find a straight line will immediately connect the first and second points. But this is just to demonstrate this point. Undo this step by pressing CTRL+Z.
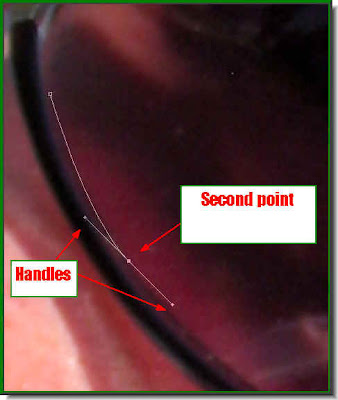 Step 15 : Now again click a second point but do not let go of the left mouse button and begin dragging. You will find the line begins to bend and two handles appear. Drag with the left button of the mouse pressed till the line corresponds to the sunglass frame.
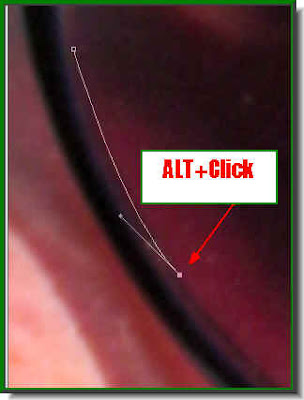 Step 16 : Now keeping ALT pressed click on the second point. One of the handles disappears.
 Step 17 : Now keeping the left mouse button pressed click a third point and again drag till the line bends to correspond with the frame. Again two handles appear. Just like in the previous step press ALT and click on the third point and one of the handles will go away. This is the secret of how you use the Pen Tool to make a selection. You must repeat this over and over again till your path is complete i.e. when you come back to the first point you clicked.
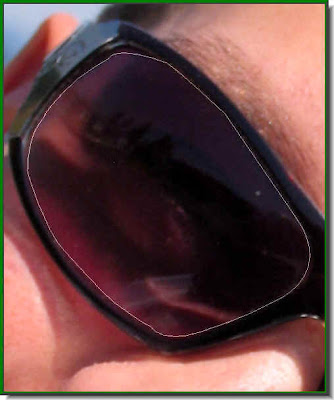 Step 18 : The entire selection has been completed. A path has formed. when you come back to first point, you will see a tiny 'o' form near the cursor. It means that the path is about to be closed.
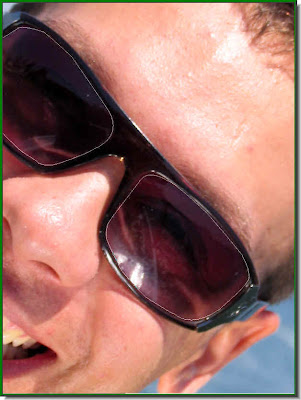 Step 19 : Now select the inside of the sunglass frame on the other eye. I don't think that will be difficult.
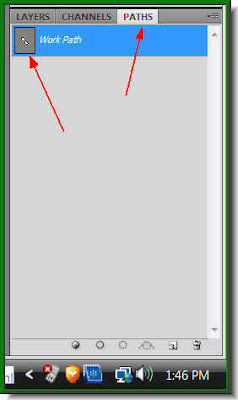 Step 20. Remember you were working in the Layers pallette. Now click on the Paths pallette. It is different from the layers pallette. You can immediately see the Workpath in the thumbnail.
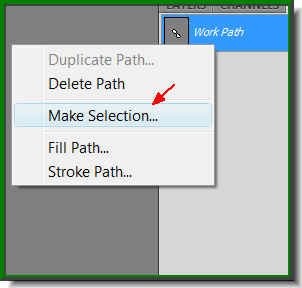
Step 21 : Right click the thumbnail. This will bring up a dialogue box. Click on Make Selection.
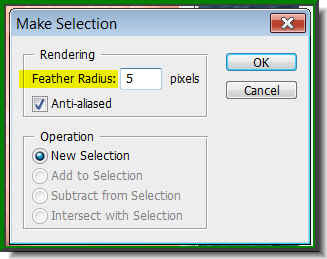
Step 22 : As soon as you click this dialogue box pops up. I have set a Feather radius of 5 pixels because this is a high resolution image. For photos with low resolution a Feather Radius of 1 or 2 pixels should suffice. Click ok.
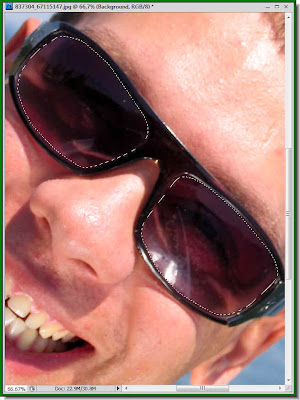
Step 23 : As soon as you click ok, a column of 'marching ants' appear around the selection.
 Step 24 : Click back on the Layers pallette and click on Layer 1 or Background copy which is on top. Turn on the eye icon of the layer. The skier's photo again becomes visible.
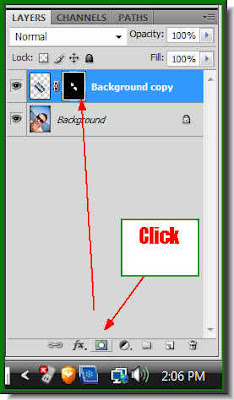
Step 25 : Now click on the Add Layer Mask button and a layer mask forms next to the layer thumbnail on Background copy layer.

Step 26 : Now reduce the Opacity of the layer to 80%. Let's see what the photo looks like.

Aha! This is how your photo looks like. That is about all. It can be done in Photoshop 7 as I said before.
Other Photoshop tutorials are here.
Post a Comment