

 Step 2 : Go to Filter>Noise>Add Noise.
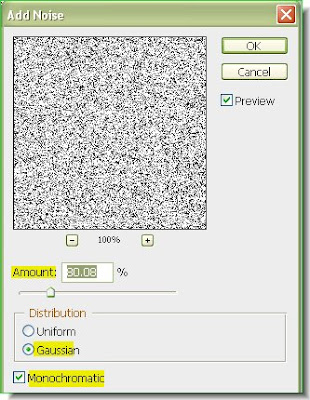 Step 3 : The Add Noise dialogue box opens. I have set 80.08% for Amount and checked Gaussian and Monochromatic. The amount figure can be put suitably depending on the size of your layer or more simply one that satisfies you.
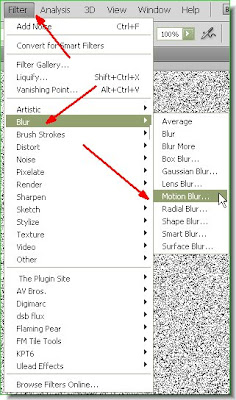 Step 4 : Go to Filter>Blur>Motion Blur.
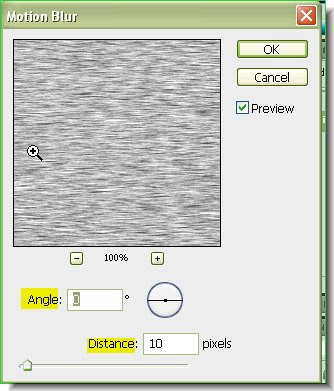 Step 5 : The Motion Blur dialogue box opens. Set the Angle to zero and the Distance suitably. I have put 10 pixels. Click ok.
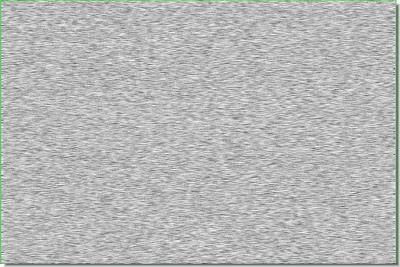 This is how the image looks after applying the Motion Blur.
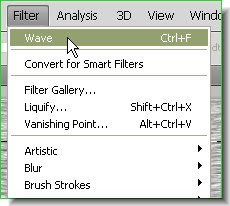
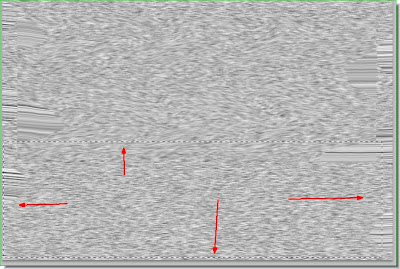
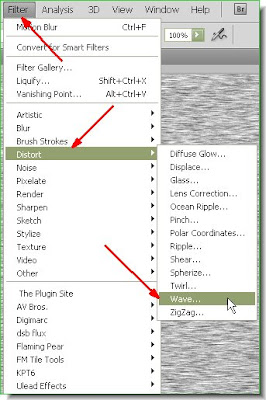 Step 6 : Go to Filter>Distort>Wave.
 Step 7 : The Wave dialogue box opens. Leave the Type set to Sine. I have set the wavelenghts to 1 and 120 and the Scale to 89% and 7%. Click ok.
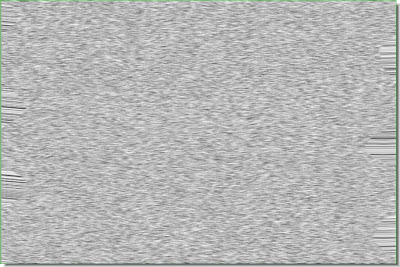
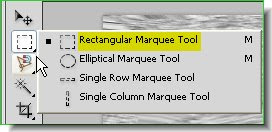
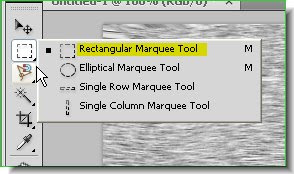 Step 8 : Select the Rectangular Marquee Tool from the flyout.
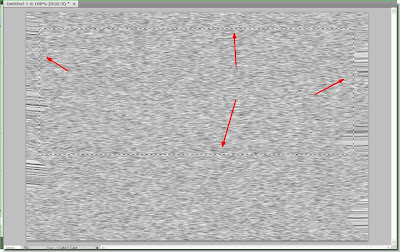

 Step 12 : Click the Rectangular Marquee Tool again.
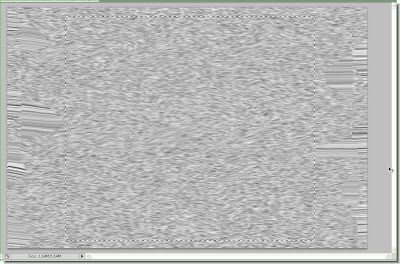 Step 13 : Draw out a selection excluding the edges as shown.

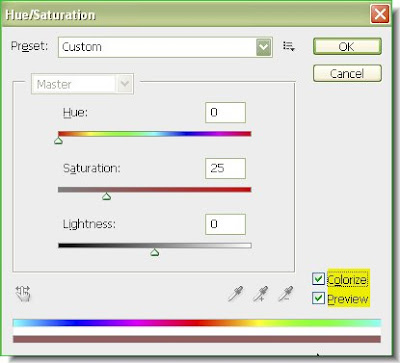 Step 16 : Press CTRL+U. The Hue Saturation dialogue box is displayed. Check the Colorize. Preview is checked by default. Do not click ok.
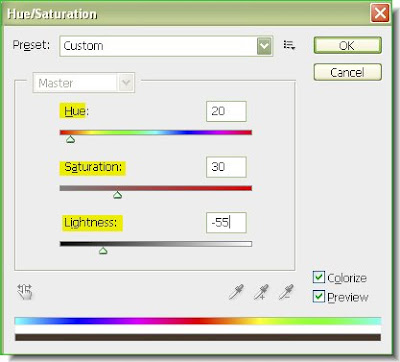 Step 17 : In the Hue Saturation dialogue box you will notice three sliders -- Hue which changes the color. If you drag the slider from the left to the right slowly, the image will change color. The Saturation increases the saturation and the Lightness slider determines how dark or how bright your image will be. I have set the Hue at 20, Saturation at 30 and Lightness at -55. Click ok.
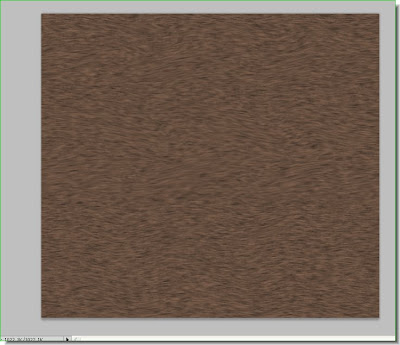 The completed wood texture. But I am not finished as yet.
Step 18 : I have now opened an image which I will use as the 'face'.

Step 19 : Look at the Layers pallette. There is only a single layer -- the Background. A Background Layer cannot be edited. But it can be edited if it is changed into a regular layer. So double click the Background. Step 20 : As soon as you double click the Background layer, this dialogue box opens up. Just click ok.
 Step 21 : Look in the Layers pallette -- the Background layer has changed in Layer 0.
 Step 22 : Now click on the Elliptical marquee Tool.
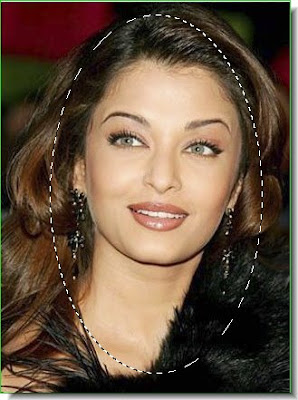
Step 23 : Draw an elliptical shape with the Elliptical Marquee Tool.
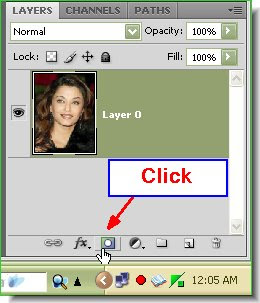
Step 24 : Now click the Add Layer Mask button at the bottom of the Layers pallette.
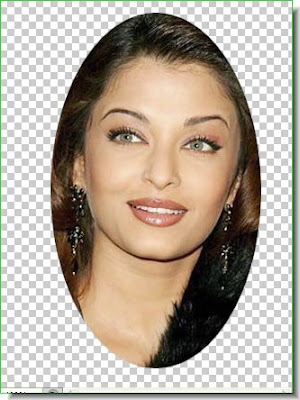
Step 25 : This is how the image looks after applying the Layer Mask.
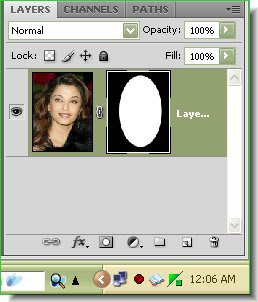
Step 26 : This is how the Layers pallette looks.
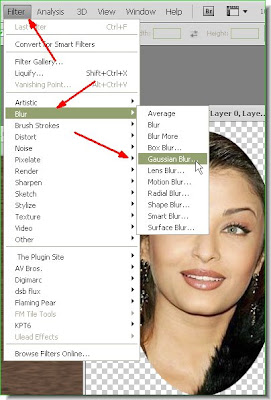 Step 27 : Go to Filter>Blur>Gaussian Blur.

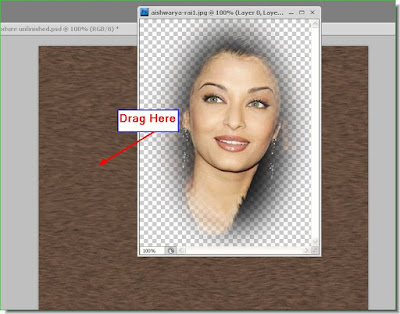 Step 30 : Drag the image to the wood texture layer while keeping the Shift key pressed. This will make the image land exactly in the middle of the wood layer.
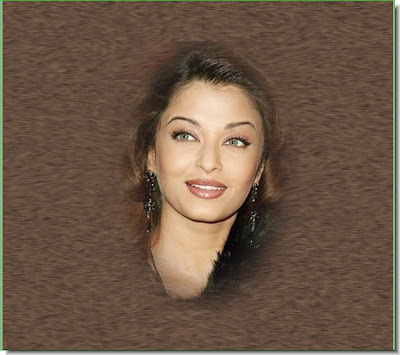 The image has dropped right into the middle of the wood texture layer.
 Step 31 : Now change the Blend Mode in the popup in the Layers pallette to Lighten or Screen.
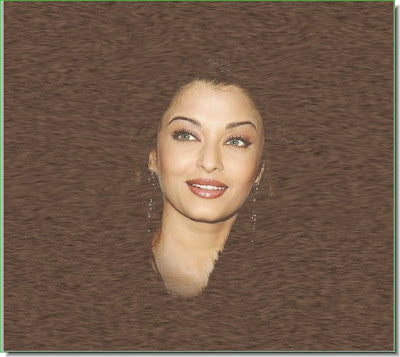
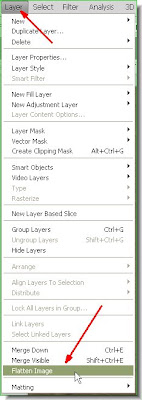 Step 32 : Go to Layer>Flatten Image.
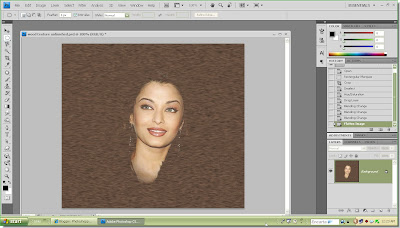
This is how the image looks after flattening. You will not notice any difference. Look in the layers pallette and you will find that all layers have been flattened into a single layer -- the Background.
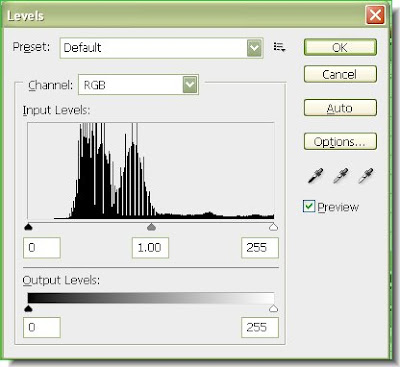 Step 33 : Press CTRL+L and the Levels dialogue pops up. Note the Black, Gray and white sliders below the black graph. The Black slider is to darken the image, the white to brighten it and the Gray to either brighten or lower the highlights.
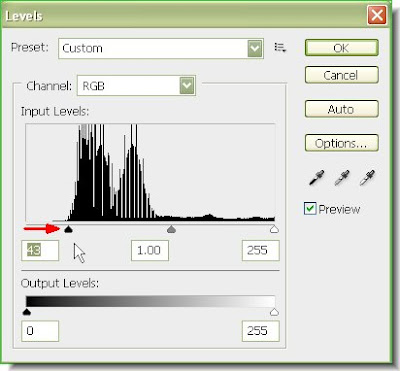 Step 34 : I have just dragged the Black slider inwards till it meets the edge of the black graph. Click ok.
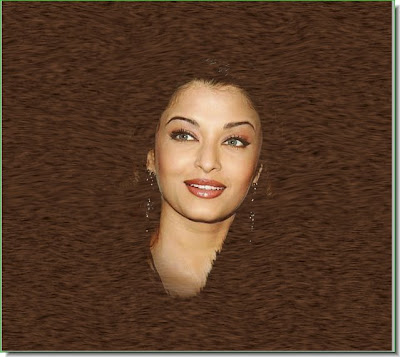 This is how the image looks.
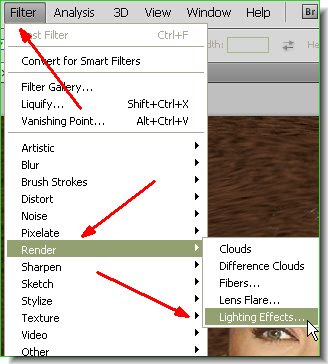 Step 35 : Go to Filter>Render>Lighting effects.
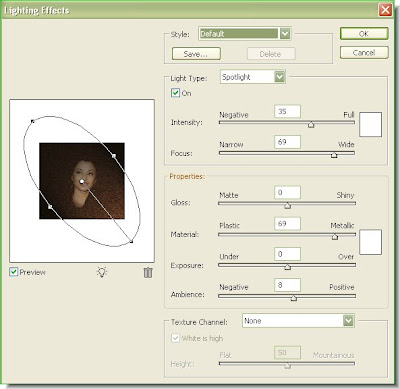 Step 36 : The Lighting Effects dialogue box opens. I have only changed the angle of the light from the right bottom to the top left with the cursor. You can rotate the light at will.
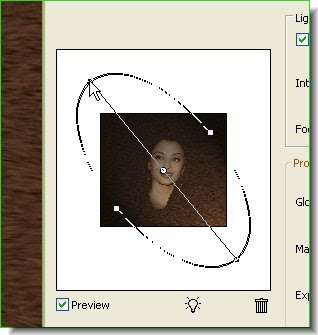 A closer look at how you can turn the angle of the light. You can drag the side handles to change the focus of the beam to fat or narrow. I will not touch that for this image.
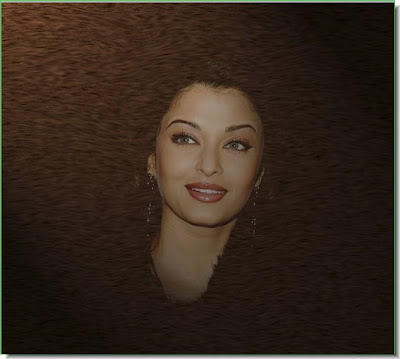
The finished image. It has a mystical, old world painted look. That's all.
Post a Comment