
Brushes in Photoshop can be used not only painting but also used for ornamentation for posters. Photoshop has its own brushes which varies a bit between versions. You can also find plenty of brushes for free on the internet, but then you must know how to load them in Photoshop before you can use them. It is not at all difficult. The internet is also an inexhaustible storehouse of free brushes. Some Brushes come in zipped files. You must know how to unzip and use them. This tutorial will show you how it can be done. Those who know how to download and install Brushes in Photoshop can skip those parts of the tutorial. Similarly you can use Textures available on the internet to add to the effect.
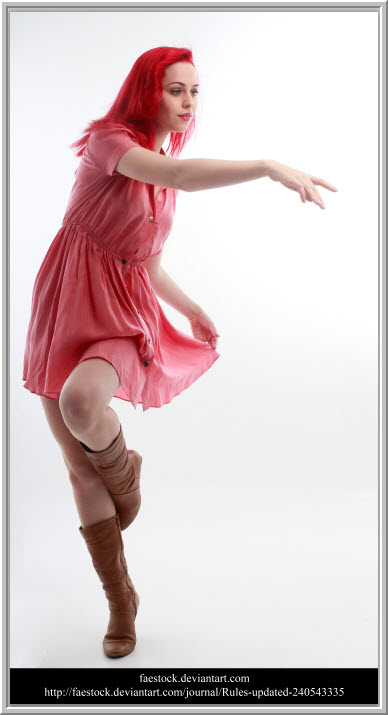
I will be using this free stock image. I am choosing this image because it is easy to separate from the white Background. You will find it here
It belongs to http://faestock.deviantart.com/
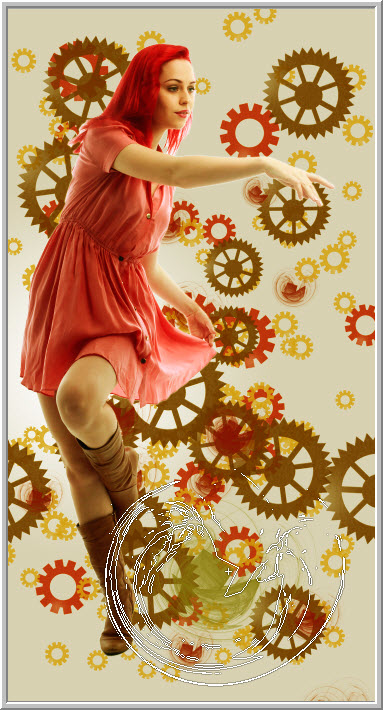
 This is the effect I will achieve.

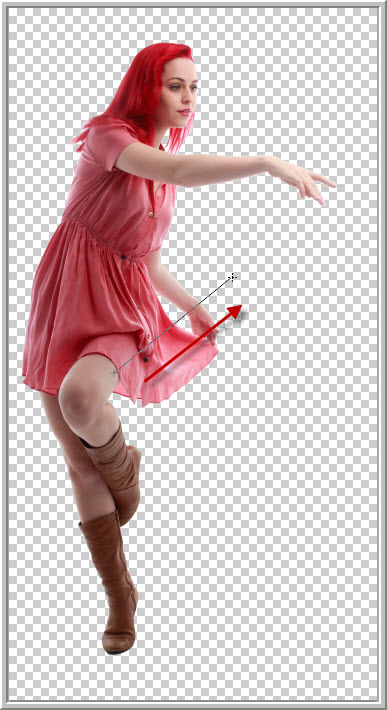
Step 1 : First get rid of the Background. You can use the Magnetic Lasso. It is not very accurate so feather the selection by about 2 pixels. You can also use the Pen Tool or the Quick Selection Tool. I have used the Quick Selection tool. You can also use the Magnetic Lasso.

Step 2 : Layer 1 contains the cut out image. Press CTRL+New Layer icon at the bottom of the Layers palette. Layer 2 forms below Layer 1.

Step 3 : Click the Foreground Color.

Step 4 : Click a shade of Grey after the Color Picker opens. If you want to get the exact color I have picked type in c7c2c2 in the highlighted box. Click OK in the Color Picker.

The Foreground Color changes to the Color picked.

Step 5 : Click the Gradient Tool.

Step 6 : Click the Radial Gradient icon.
Step 7 : Drag the Gradient Tool a part of the way from top to bottom in a slanted way as shown.

The image looks like this.

Step 8 : Click on Layer 1 to select it. Click the New Fill or Adjustment Layer button at the bottom.

Step 9 : Click on Curves from the pop up menu.

Step 10 : The Curves Adjustment Layer appears.

Step 11 : Click two points on the diagonal in the middle.

Step 12 : Push the top point up slightly and the one at the bottom slightly down so it looks like S..

Step 13 : Now click on the Blue channel.

Step 14 : Click in the middle of the diagonal and drag down gently a little bit as shown.

The image looks like this.

Step 15 : Click on Layer 2 which contains the Gradient. Then click the New Layer icon at the bottom.

Step 16 : A new Layer 3 forms above Layer 2.

Download these brushes from this link
They are free and provided by hannarb

Make a new folder on your hard drive and download it.

Click Save at the right bottom to save the Brush to the folder.

Step 17 : To bring up the Brush Tool just press b on the keyboard or you can access it from the fly out at the left of Photoshop. Click at the left in the top panel and then at right to reveal the drop down menu. Click on Load Brushes.

Step 18 : Navigate to the folder where you downloaded the Brush and click on it.

Step 19 : Click where shown on the top panel to reveal the Brushes. You will find the Brushes you loaded at the very bottom.

Step 20 : Click on the Foreground Color. Note it is the color last used. Therefore it is not Black by default.

Step 21 : The Color Picker comes up. Move the cursor outside the Color Picker. You will be able to see it.

Step 22 : I have clicked on the dress.

Step 23 : Look at the Color Picker. The shade of Red has been automatically elected. The new at the top shows the shade picked. Click OK in the Color Picker.

The Foreground Color changes to the color picked.

Step 24 : Click the Brush Tool again.

Step 25 : I have clicked on Brush Gear7.

Step 26 : If you place the Brush on the image you can see what it looks like. Do not click with it. If you do accidentally press CTRL+Z to undo.

Step 27 : Click the Brush icon at right. The Brush dialogue opens.

Step 28 : Click on Brush Tip Shape if it is not highlighted. Drag the Spacing slider till the gears separate.

Step 29 : Next click on Shape Dynamics. At the right drag the Size Jitter to 50%.

Step 30 : Next click on Scattering. Drag the Scatter slider to 500%. Leave Both Axes unchecked.

Step 31 : Click the tinny double arrows to make the Brush panel go away.

If you place the cursor on the image the Brush looks like this. To make it bigger press ] (right square bracket), to make it small press [ (left square bracket).

I have pressed the [ (left square bracket) to make the Brush smaller.

Step 32 : Drag the Brush randomly over the image.

Step 33 : Click the Foreground Color.

It brings up the Color Picker.

Step 34 : I have clicked on the thigh of the girl.

Step 35 : The new color is automatically selected in the Color Picker. Click OK.

The Foreground Color changes to the Color Picked.

Step 36 : I am making the Brush smaller by pressing the [ (left square bracket).

Step 37 : Before using the Brush again. Click the New Layer icon and a new layer 4 forms.

Step 38 : Again drag the Brush over the image at random.
This is how you download a Brush and use it in Photoshop. You have to go through all the steps from Step 25 for using each Brush. Also remember that you should make a separate layer for all Brushes. Also note that though I can use any color from the Color Picker, I am only using those found in the image. This is because it blends easily with the image.

Step 39 : Click in the top panel to open the Brushes. I have now clicked on Gear1.

Step 40 : Click the Foreground Color.

Step 41 : The Color Picker opens.

Step 42 : I am clicking on the stocking.

The color is automatically selected in the Color Picker. Click OK.

The Foreground changes to the Color picked.

Step 43 : I am increasing the size of the Brush by pressing ] (right square bracket).

Step 44 : Click on the Brush icon at the right. The Brushes panel opens. Click on Brush Tip Shape. Drag the Spacing slider till the gears separate.

Step 45 : Click on Shape Dynamics. Drag the Size Jitter to 50%.

Step 46 : Lastly click on Scattering. Drag the Scatter slider to 500%. You have to give these settings each time you select a Brush.

Step 47 : Click the new Layer icon. A new Layer 5 forms. For each Brush you must have a new layer. The advantage of this is that if you do not like a particular Brush effect you can simply delete the layer. If you do all your brush work on a single layer this will not be possible.

Step 48 : Again drag at random with the Brush.


You can download it from the highlighted link above. It is not freeware, but you can use the trial version, which will do just as well.


Step 52 : Click on the Foreground Color.


Step 56 : Make the Brush large by pressing ] (right square bracket). I have clicked once with it at the bottom.


and click OK in the Color Picker.


Install it in Photoshop as shown earlier. This Brush is an abr file.


It is a jpeg and opens in photoshop like any other image. Open it in photoshop.


You get this message. Click OK.


Open it in Photoshop.


Press ENTER.


Other Photoshop tutorials are here
.
Post a Comment